Print Quality Troubleshooting
Having issues with your prints? Tap any problem below to see the causes and fixes.
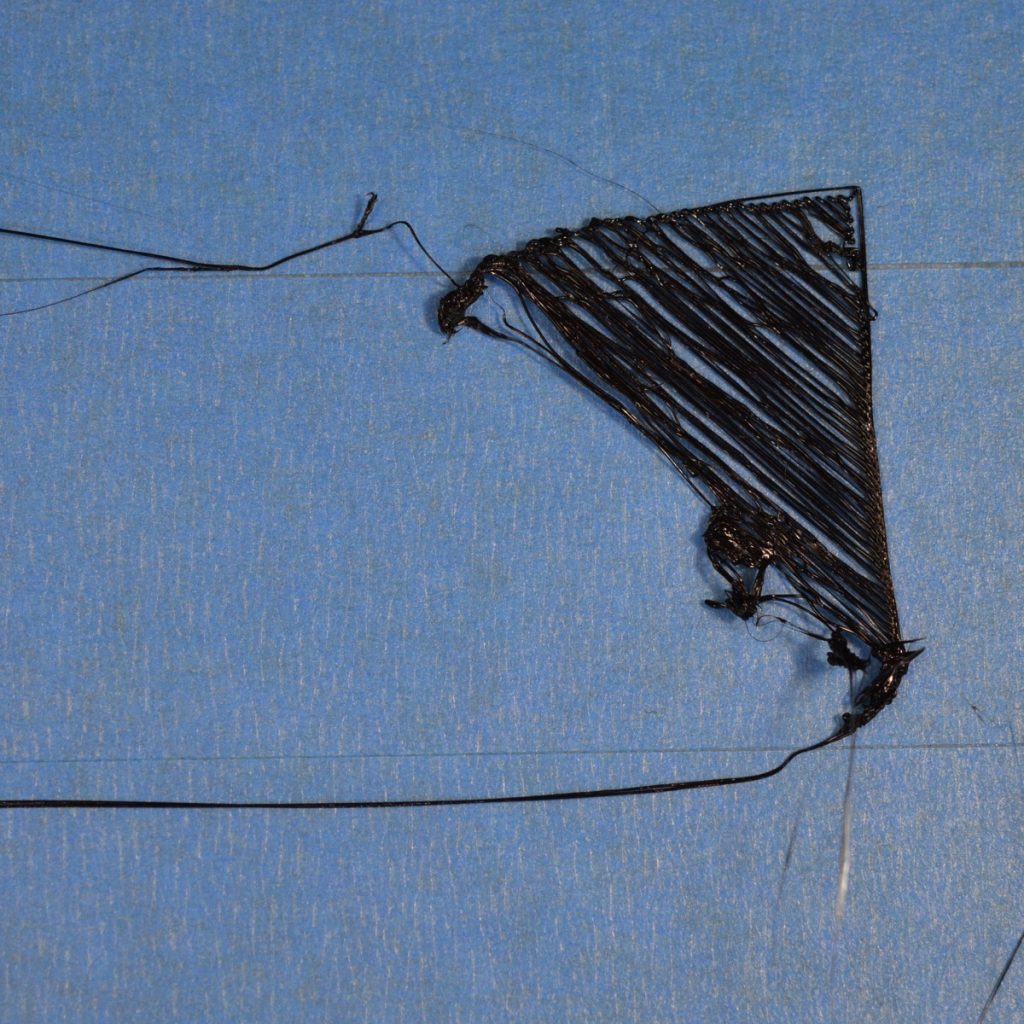
Why it happens:
- Nozzle too far from the bed — filament isn't pressed firmly onto the surface.
- Bed surface is dirty (oils, dust, leftover residue).
- Bed temperature too low for the filament you're using.
- First-layer speed too fast.
How to fix it:
- Re-level the bed: slight resistance when sliding paper between nozzle and bed.
- Clean the bed with isopropyl alcohol (IPA) before every print.
- Raise bed temperature by 5°C increments until adhesion improves.
- Slow first-layer speed to 20–30% of normal.
- Add a brim in your slicer for small or tall parts.
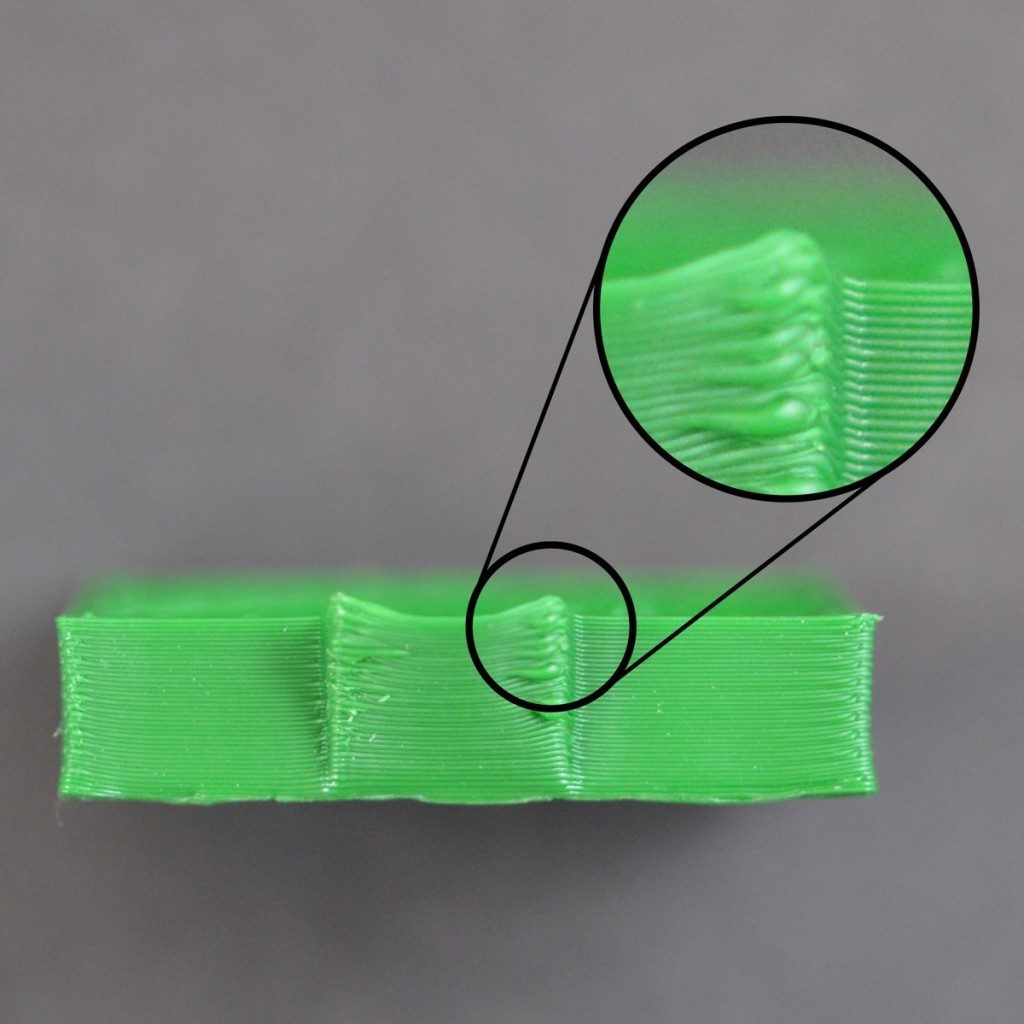
Why it happens:
- Rapid cooling causes thermal contraction — layers shrink unevenly.
- Drafts or cold ambient temperatures cool the print unevenly.
- Large flat prints with no brim are especially vulnerable.
How to fix it:
- Use a heated bed. ABS needs 90–110°C; PLA works at 50–65°C.
- Enclose your printer to trap heat and eliminate drafts.
- Add a brim (3–8mm) to anchor the part.
- Apply a thin layer of glue stick to the bed.
- Reduce cooling fan speed for the first few layers.
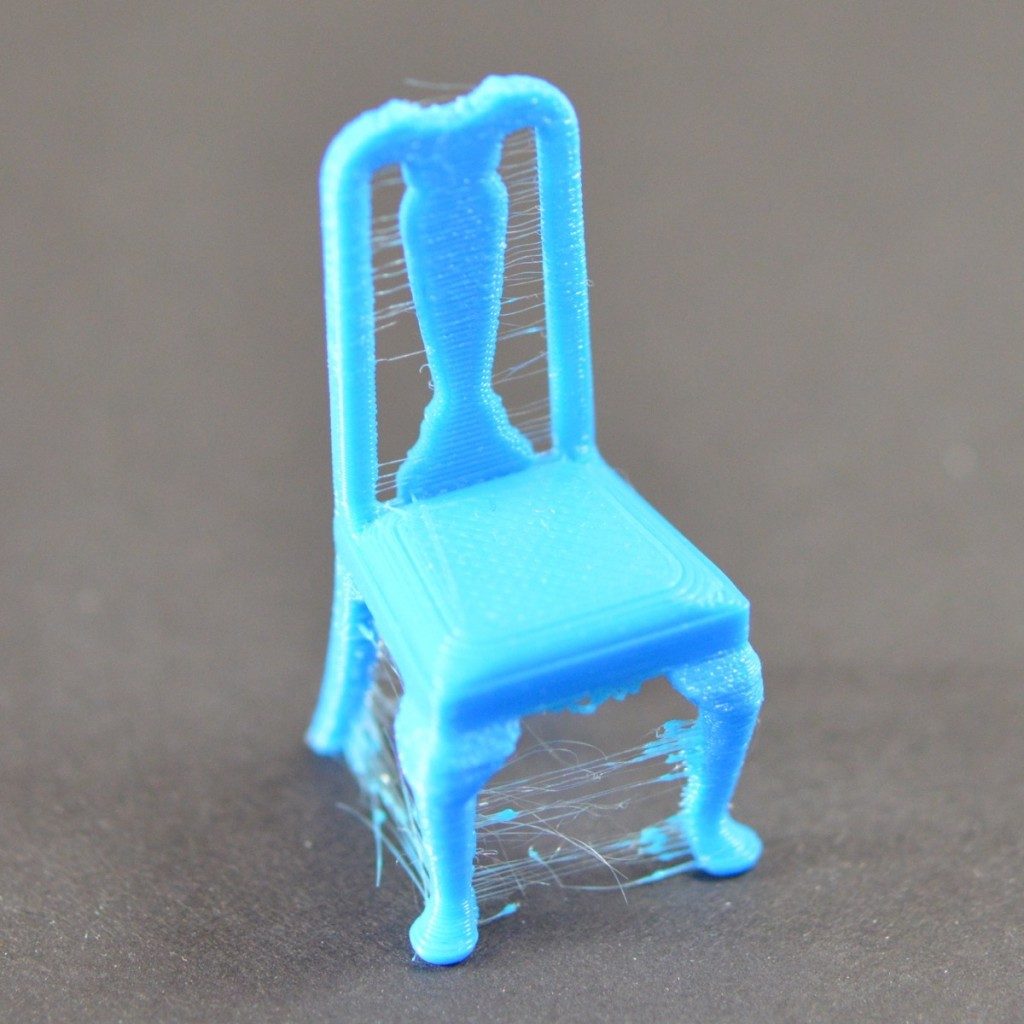
Why it happens:
- Nozzle too hot — melted filament drips during travel moves.
- Retraction too weak or disabled.
- Travel speed too slow.
How to fix it:
- Lower print temperature by 5°C at a time.
- Enable retraction: 4–6mm for Bowden, 1–2mm for direct drive.
- Increase travel speed to 150–200mm/s.
- Enable "Combing" in Cura or "Avoid crossing perimeters" in PrusaSlicer.
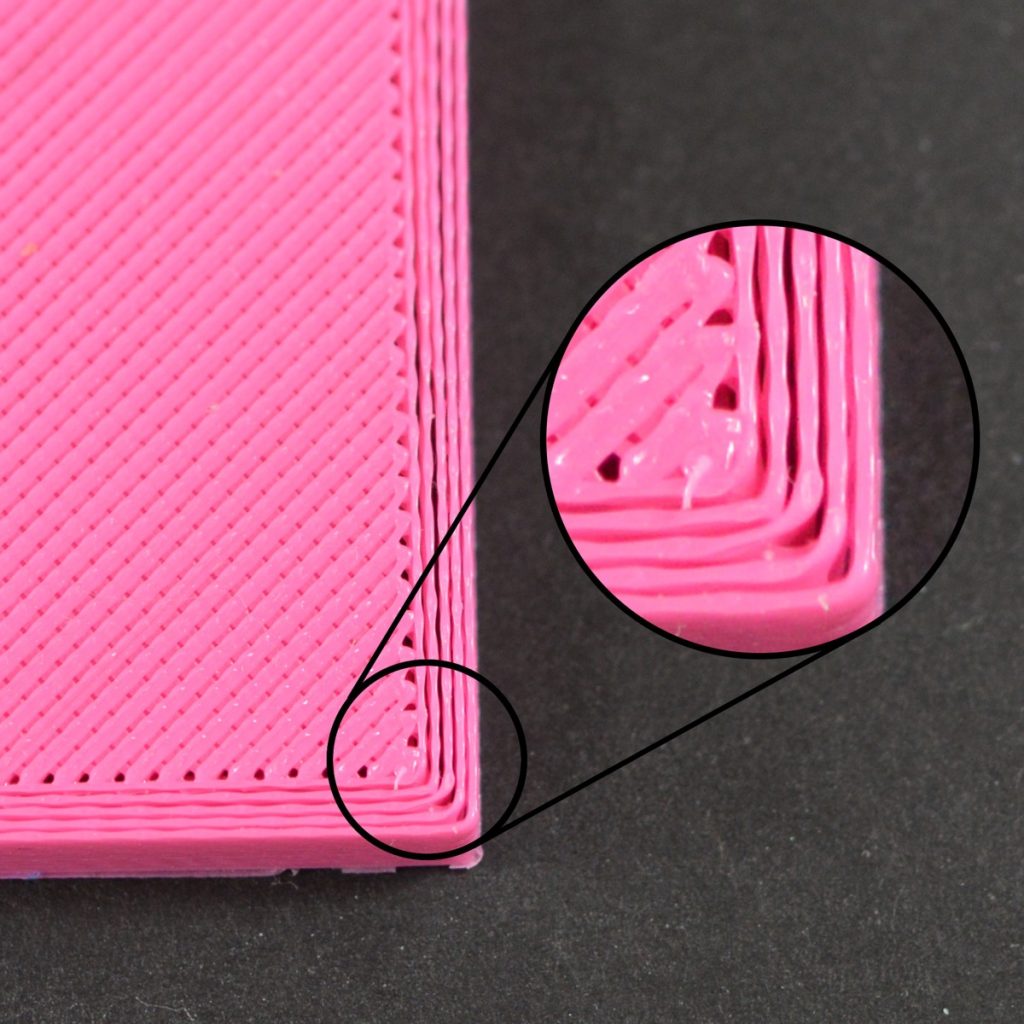
Why it happens:
- Print temperature too low — filament doesn't flow freely.
- Partial or full nozzle clog.
- Extruder E-steps miscalibrated.
- Print speed too fast for the nozzle to keep up.
How to fix it:
- Increase print temperature by 5–10°C.
- Clean the nozzle with a cold pull or clear debris while hot.
- Calibrate E-steps — extrude 100mm and measure what actually comes out.
- Reduce print speed by 20–30%.
- Increase flow rate slightly in your slicer.
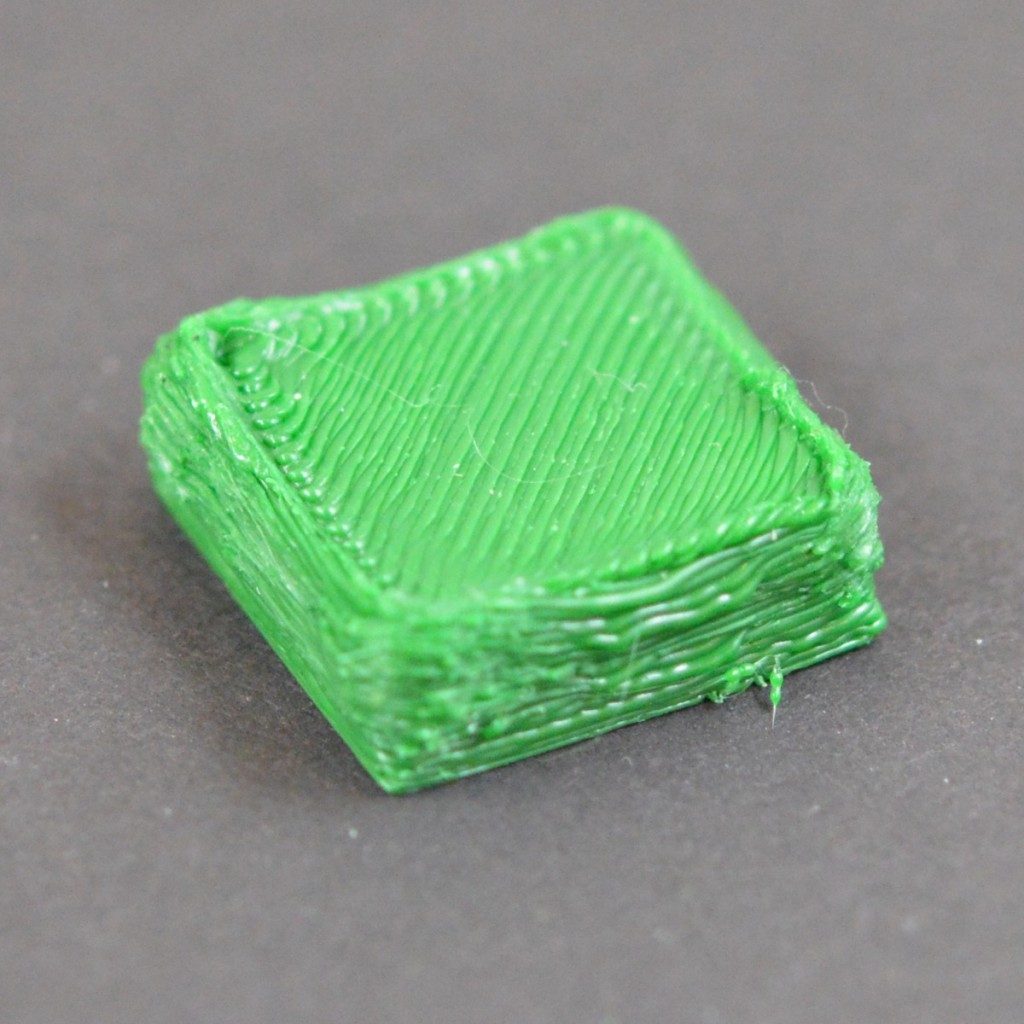
Why it happens:
- Flow rate / extrusion multiplier too high.
- Filament diameter in slicer doesn't match actual filament.
How to fix it:
- Measure filament diameter with calipers at multiple points and update the slicer.
- Reduce flow rate by 5% increments until surfaces look clean.
- Print a calibration cube and compare measured vs expected dimensions.
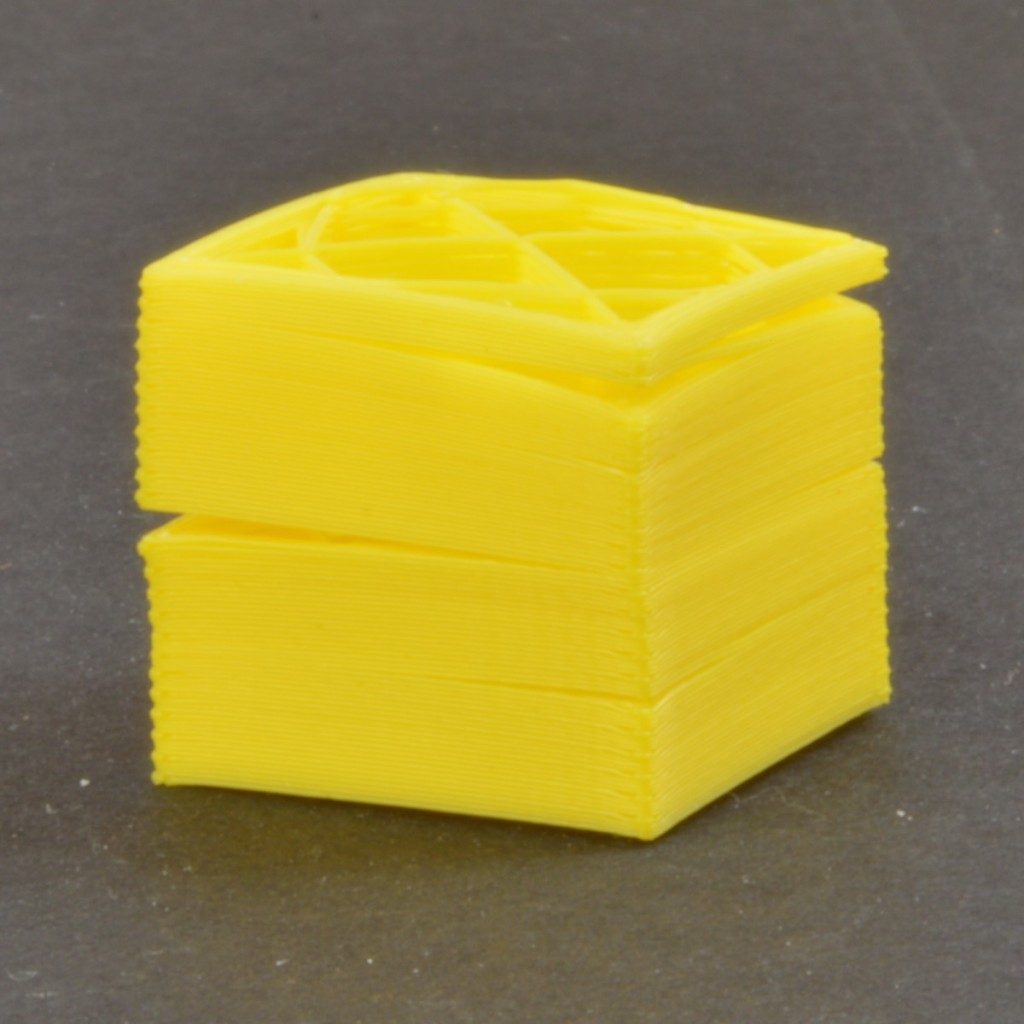
Why it happens:
- Print temperature too low — layers don't bond.
- Layer height too tall relative to nozzle diameter.
- Cooling too aggressive between layers.
How to fix it:
- Increase print temperature by 5–10°C.
- Keep layer height below 80% of nozzle diameter (max 0.32mm for 0.4mm nozzle).
- Reduce fan speed to allow layers more time to fuse.
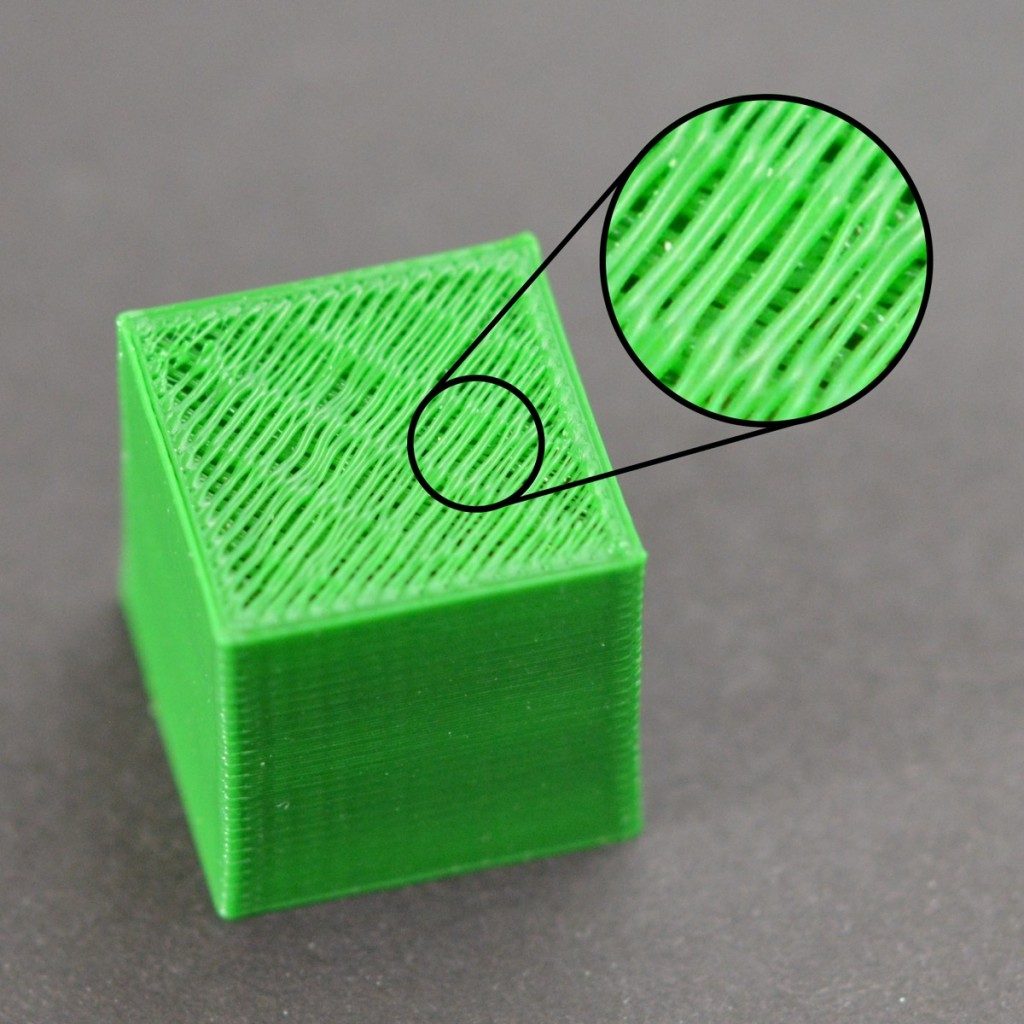
Why it happens:
- Too few top layers — infill pattern shows through.
- Under extrusion starving the top surface.
- Infill percentage too low.
How to fix it:
- Increase top layers to at least 4–6 (or ~1.2mm).
- Raise infill to at least 20%.
- Address any under extrusion issues (see #4).
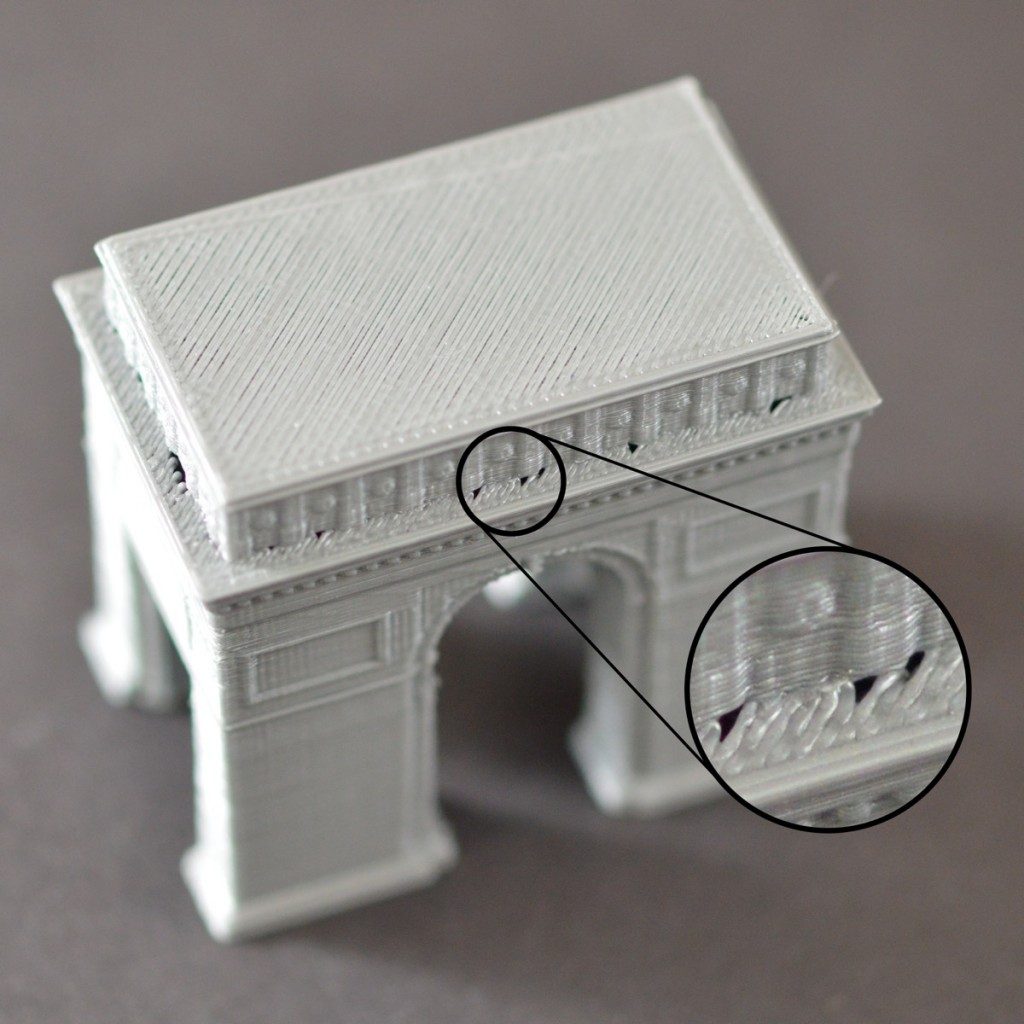
Why it happens:
- First layer squished too hard — nozzle too close to bed.
- Bed temperature too high, keeping the first layer too soft.
How to fix it:
- Raise the nozzle slightly when re-leveling.
- Lower bed temperature by 5°C.
- Enable "Elephant's Foot Compensation" in PrusaSlicer or Cura.
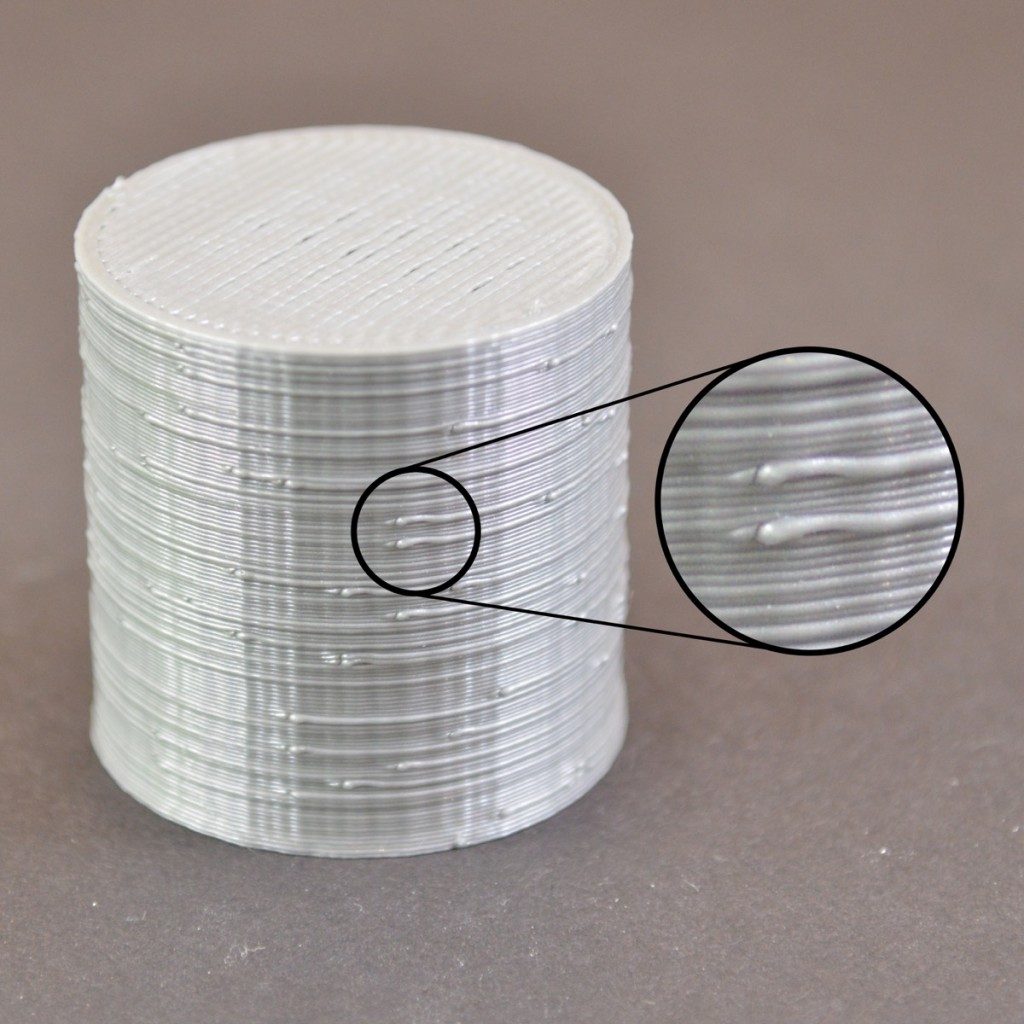
Why it happens:
- Pressure builds in the nozzle at direction changes, then releases as a blob.
- Too much retraction causes ooze when restarting.
How to fix it:
- Enable "Coasting" to relieve nozzle pressure before end of a line.
- Set seam position to "rear" so blobs hide at the back.
- Fine-tune retraction in 0.5mm increments.
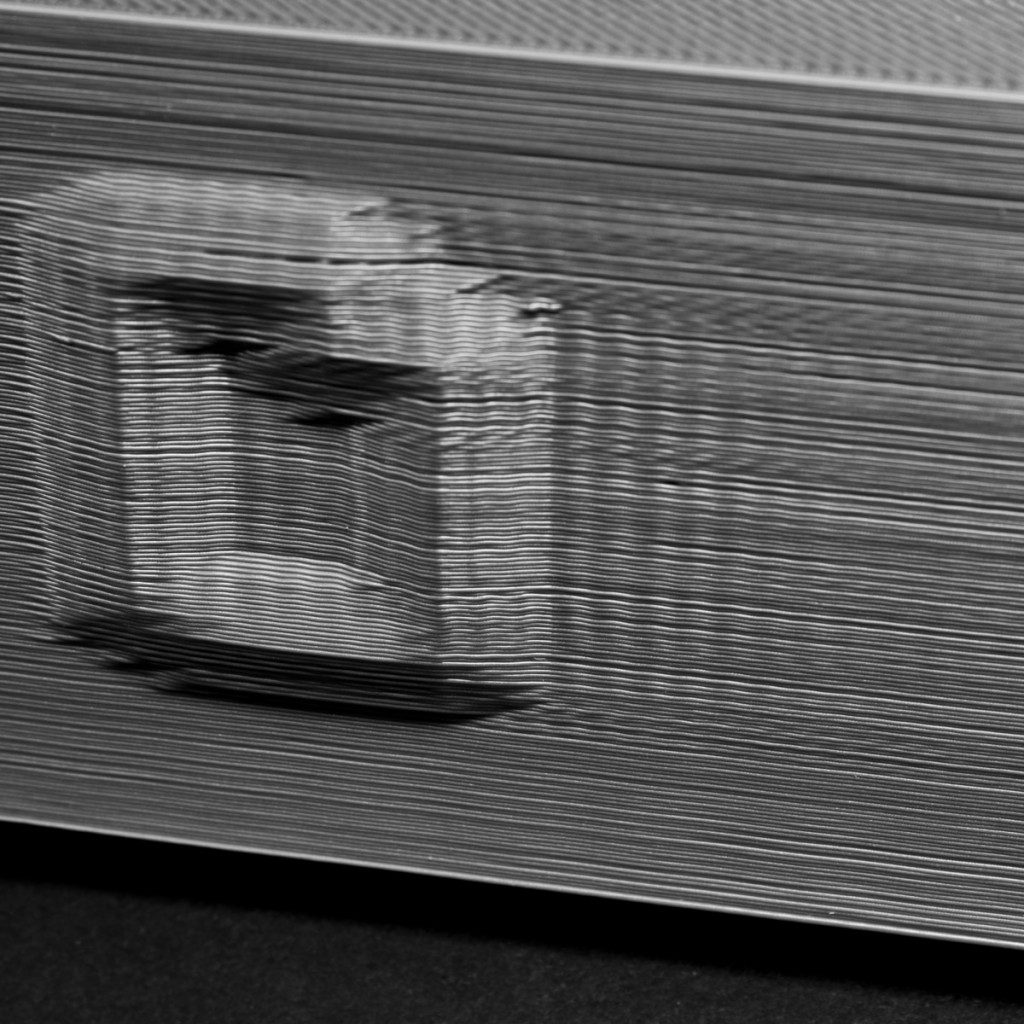
Why it happens:
- Frame vibration from fast movements shakes the print head.
- Loose belts or frame components amplify vibration.
How to fix it:
- Reduce print speed and acceleration — 60 → 40mm/s makes a noticeable difference.
- Tighten all belts until they resist when plucked.
- Check and tighten all frame screws and eccentric nuts.
- Enable Input Shaping if your firmware supports it (Marlin or Klipper).
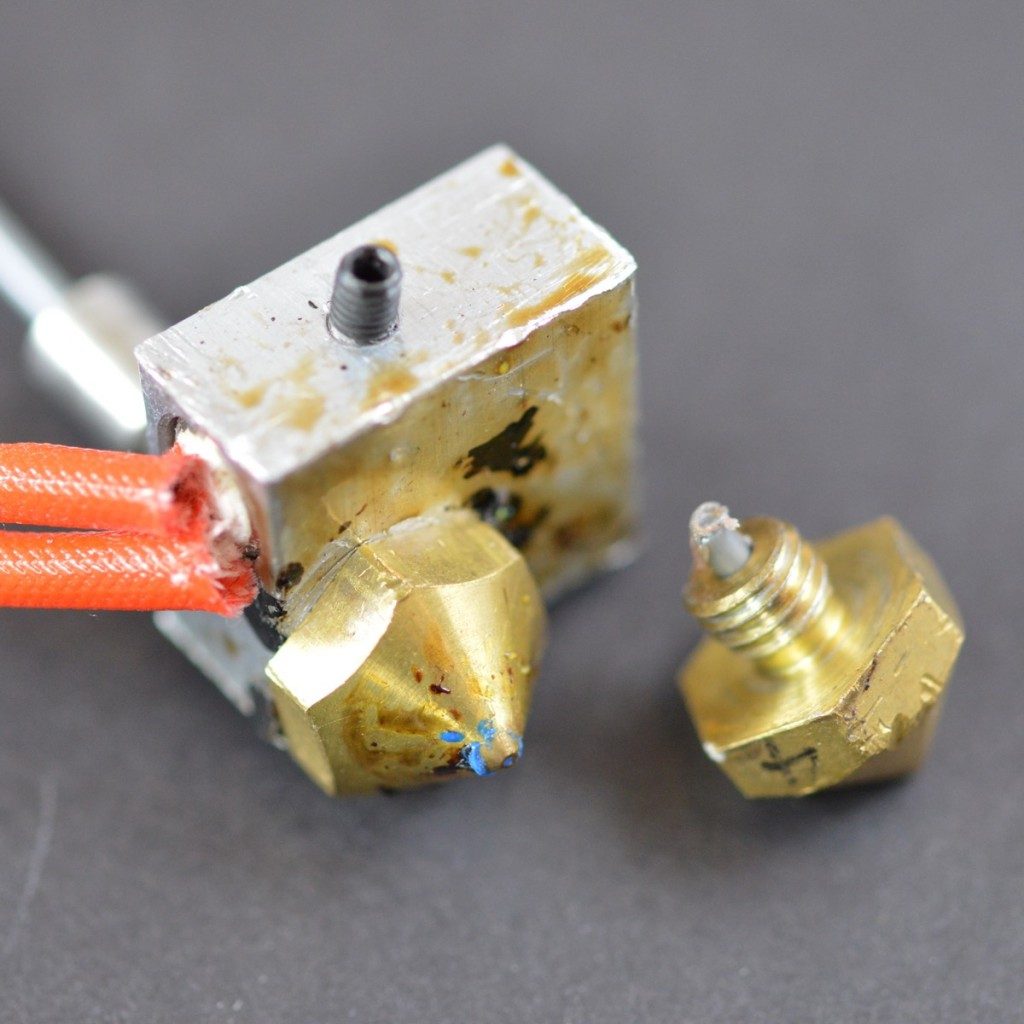
Why it happens:
- Burnt or carbonized filament builds up inside the nozzle.
- Printing too cold causes partial melts that solidify.
- Debris or foreign material in the filament.
How to fix it:
- Cold pull: Heat to printing temp, push filament manually, cool to 90°C then pull firmly.
- Use a thin needle to poke through the tip while hot.
- For severe clogs: remove the nozzle, soak in acetone (ABS only) or burn clean with a torch.
- Replace the nozzle — they're cheap and often the fastest fix.
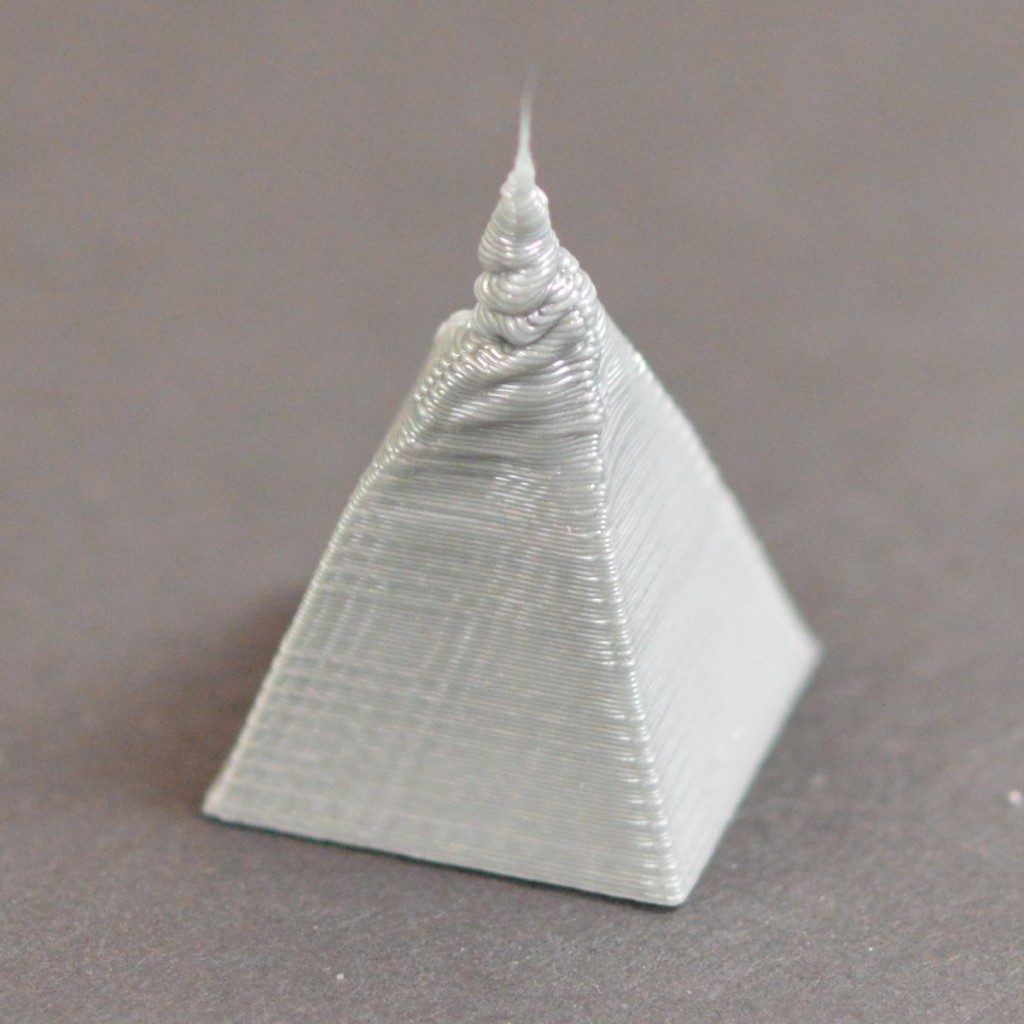
Why it happens:
- Cooling too fast — top layers solidify before bridging infill gaps.
- Not enough top layers.
- Infill too low, leaving large unsupported spans.
How to fix it:
- Increase top solid layers to 5–7.
- Increase infill to 20–30%.
- Reduce cooling fan speed on top layers to let them flow flat.
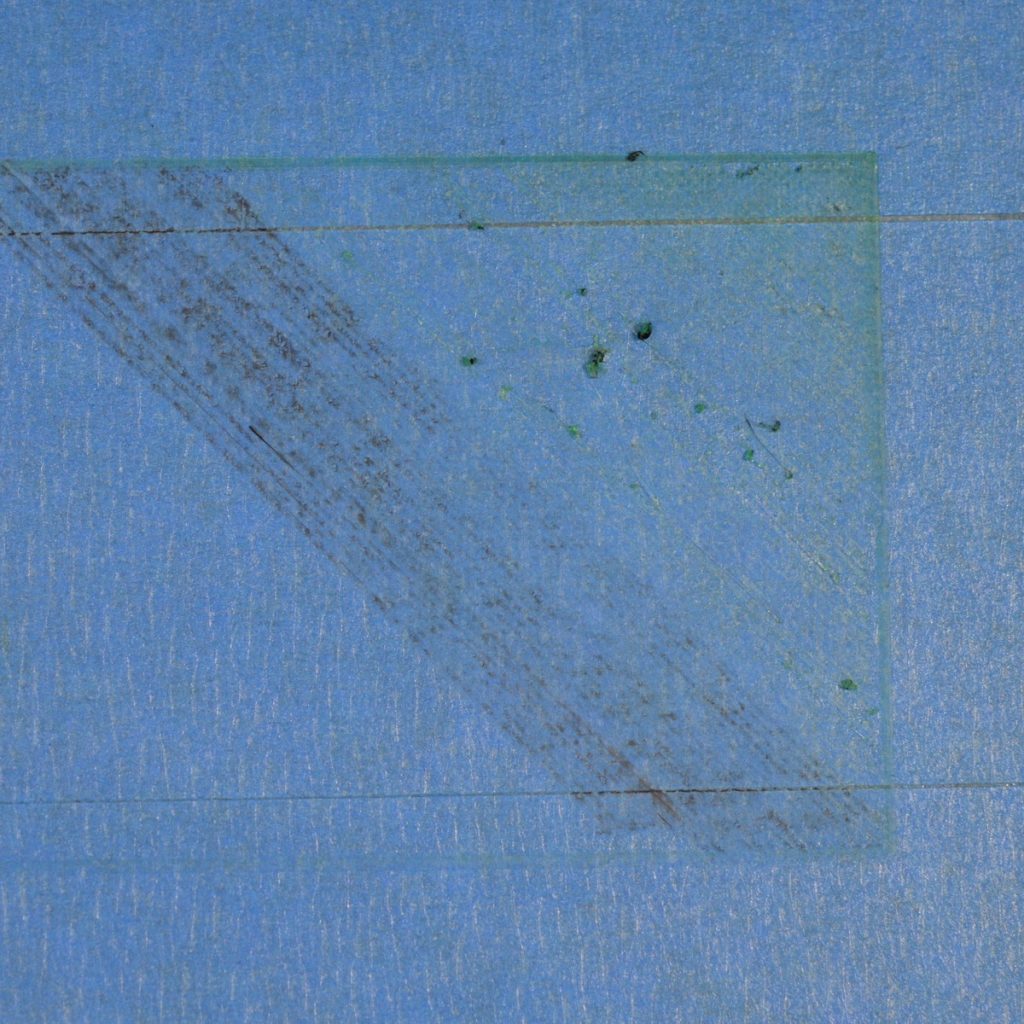
Why it happens:
- The nozzle was not primed before the print — residual pressure lost during heat-up.
- Retraction at the end of the last print pulled filament too far back.
- Start G-code is missing a purge/prime line.
How to fix it:
- Add a purge line to your start G-code — a simple line printed along the edge of the bed primes the nozzle.
- Reduce end-of-print retraction distance.
- Manually extrude a few mm before starting to ensure filament is at the tip.
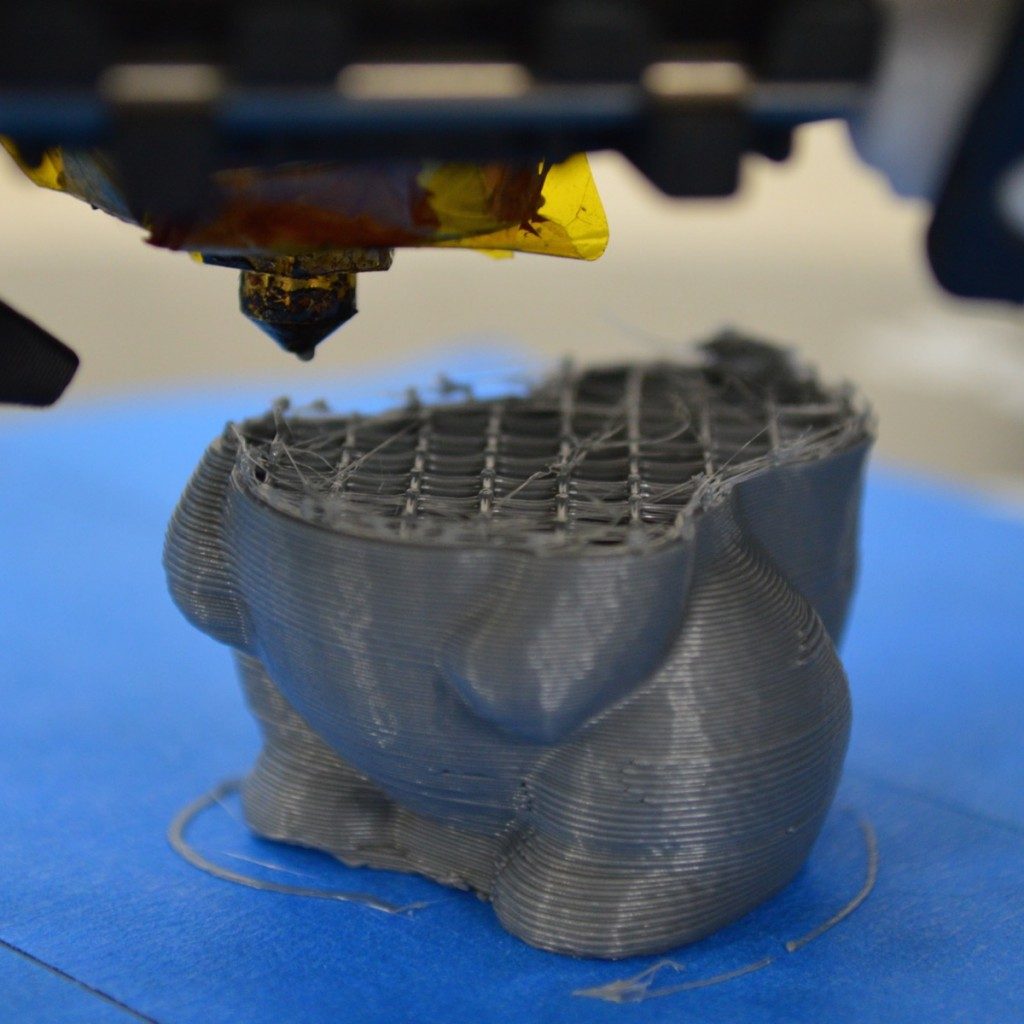
Why it happens:
- The filament spool has tangled and locked up.
- The extruder has ground through the filament (see #15).
- A heat creep clog forms gradually — the hot zone creeps up and softens filament too early.
- The filament ran out.
How to fix it:
- Check the spool for tangles and ensure it unrolls freely.
- Improve hotend cooling — make sure the heatsink fan is always running.
- Use an all-metal hotend for flexible or high-temp filaments prone to heat creep.
- Install a filament runout sensor to pause automatically.
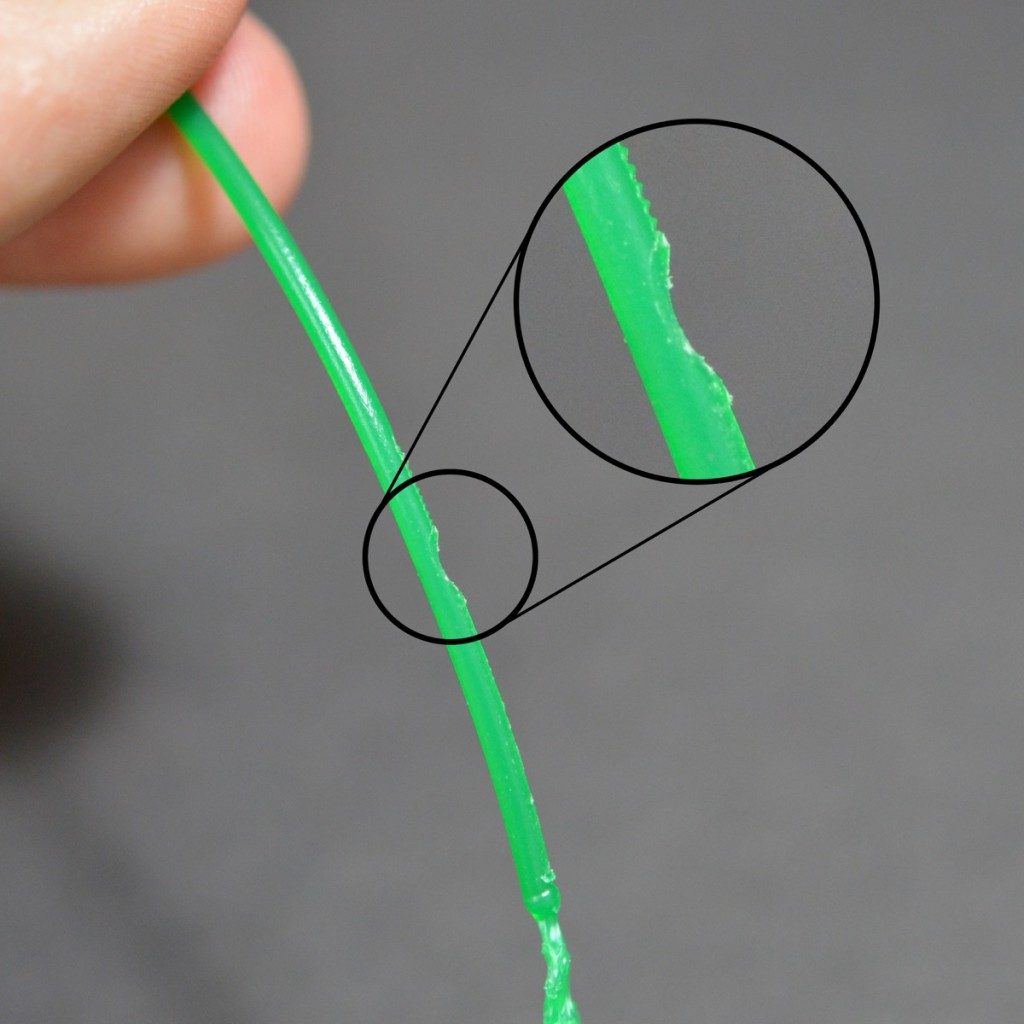
Why it happens:
- The nozzle is clogged or too cold — the extruder motor keeps pushing but the filament can't move.
- Print speed or retraction too aggressive for the extruder to handle.
- Extruder tension too high, biting into soft filaments (TPU, flexible).
How to fix it:
- Clear any nozzle clogs first — grinding is usually a symptom, not the root cause.
- Increase print temperature so filament flows more easily.
- Reduce print speed and retraction distance.
- Adjust extruder arm tension — just enough grip without chewing.
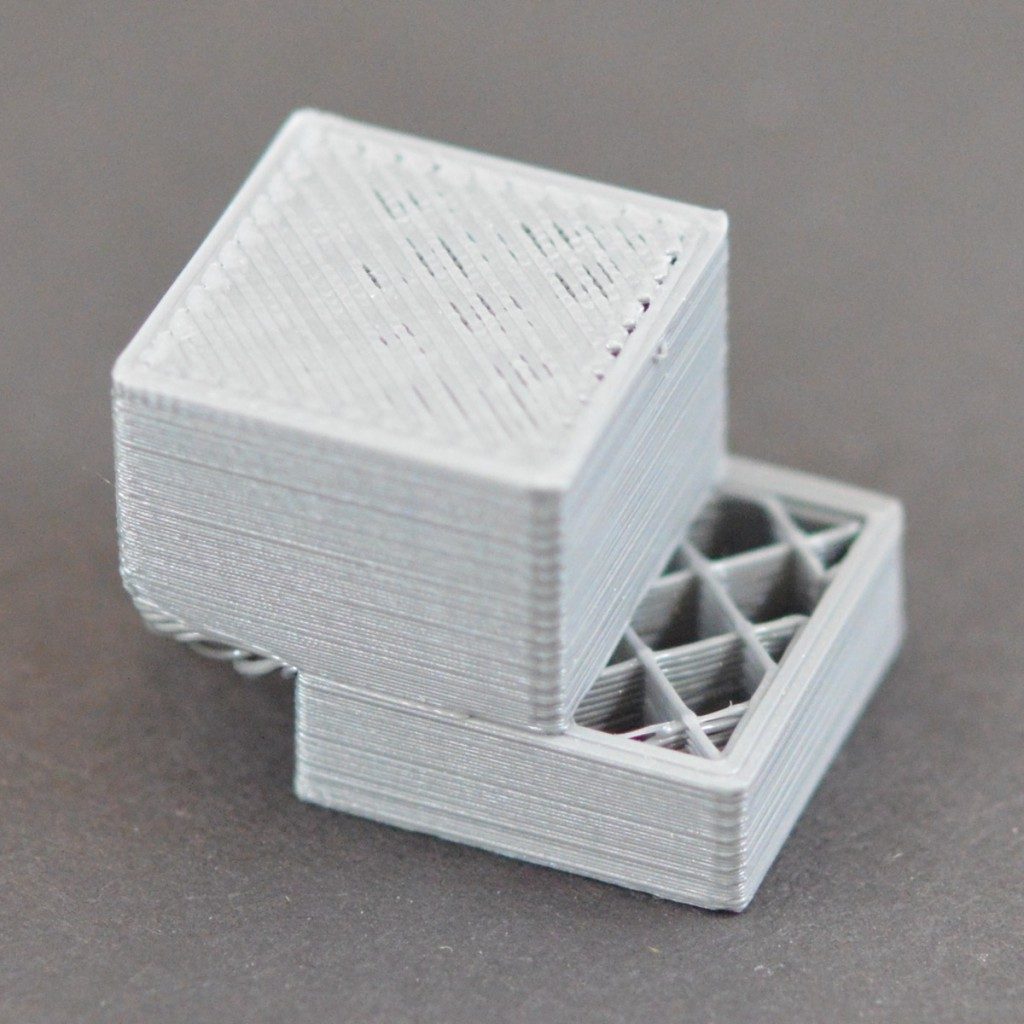
Why it happens:
- Belts are too loose — the motor skips steps under fast movement.
- Print speed too high, causing the stepper motor to lose position.
- The nozzle collides with a warped part or blob and gets knocked off position.
- Stepper motor current too low — motor doesn't have enough torque.
How to fix it:
- Tighten X and Y belts — they should have a firm, guitar-string-like tension.
- Reduce print speed and acceleration.
- Check for and fix any bed adhesion issues that cause blobs or collisions.
- Increase stepper motor current slightly in firmware (with caution — too much causes overheating).
Why it happens:
- Small cross-sections print so fast each layer has no time to cool before the next is added.
- Insufficient part cooling fan airflow.
- Print temperature too high for fine detail.
How to fix it:
- Enable "Minimum Layer Time" in your slicer (e.g. 10–15 seconds) — the printer slows down to let each layer cool.
- Increase part cooling fan to 100% for PLA.
- Print two copies at once so the nozzle alternates between them, giving each more cooling time.
- Lower print temperature by 5°C.
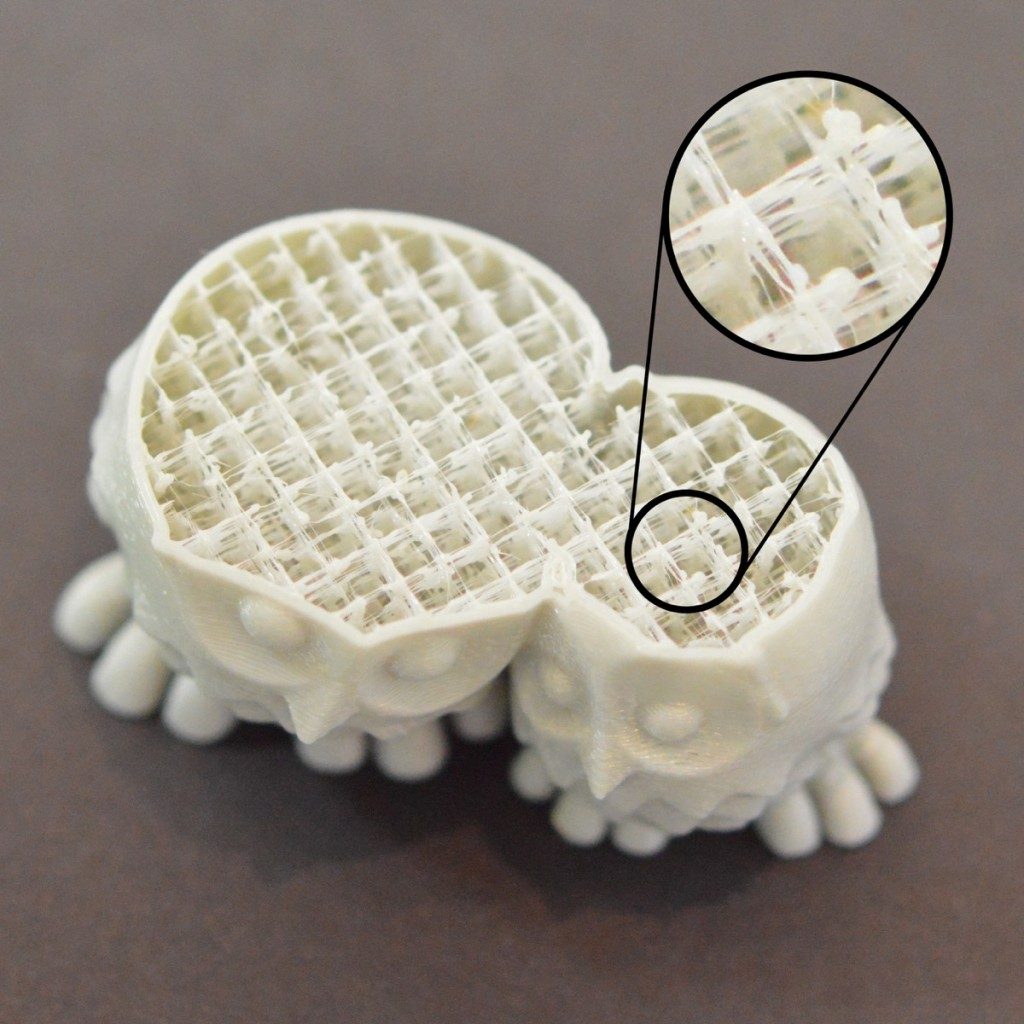
Why it happens:
- Infill print speed too high — the nozzle can't keep up and under-extrudes on infill lines.
- Infill overlap with perimeters set too low.
- Overall under extrusion affecting infill more noticeably.
How to fix it:
- Reduce infill speed — it's often set higher than perimeters but shouldn't exceed what your hotend can push.
- Increase infill/perimeter overlap to 25–30% so infill bonds well to the walls.
- Address any overall under extrusion (see #4).
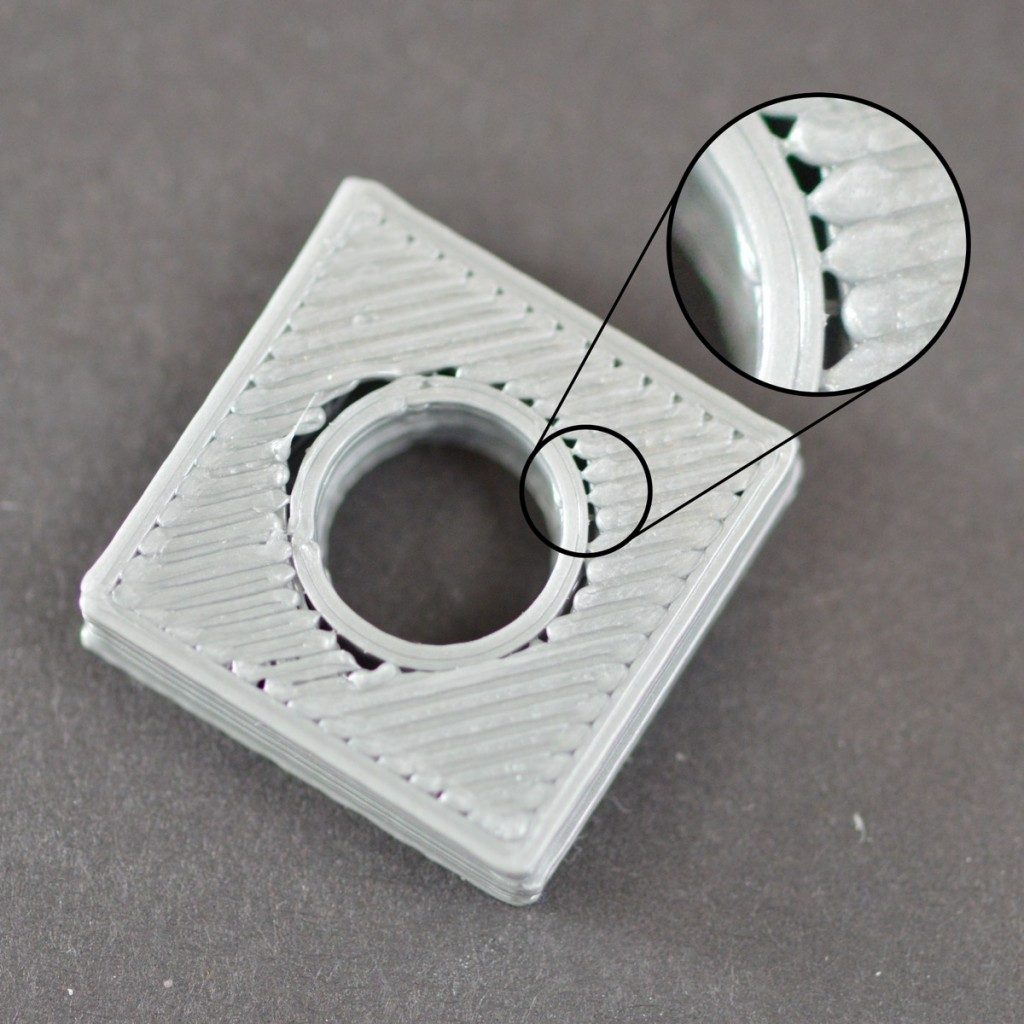
Why it happens:
- Infill overlap percentage too low — infill lines don't reach the perimeter.
- Large speed difference between perimeter and infill causes the transition to miss.
How to fix it:
- Increase infill overlap to 25–35% in your slicer settings.
- Reduce the speed difference between perimeters and infill.
- Slightly increase flow rate to ensure lines are wide enough to connect.
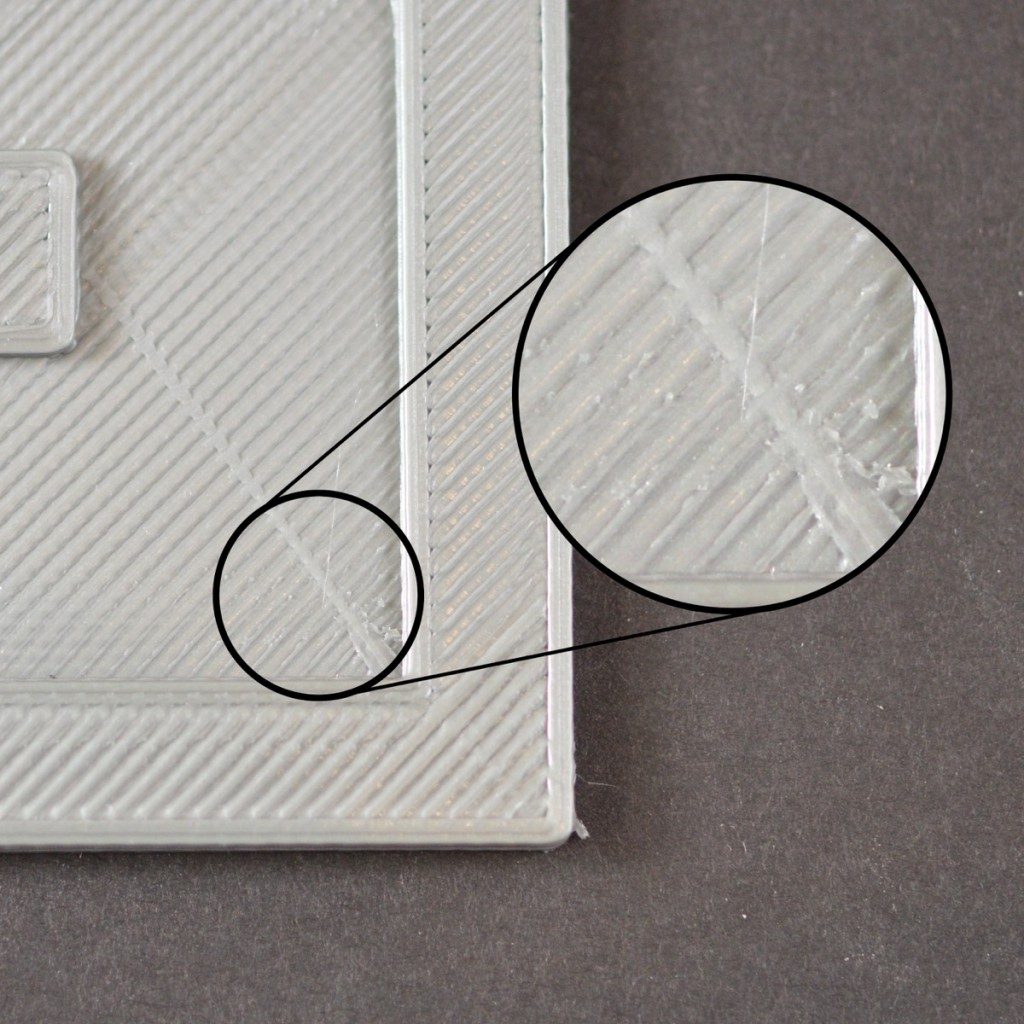
Why it happens:
- Over extrusion causes lines to be slightly raised — the nozzle then scrapes over them.
- Z-hop is disabled — nozzle travels across finished surfaces instead of lifting.
- Combing is disabled, so travel moves cross over printed areas.
How to fix it:
- Enable Z-hop on travel moves (0.1–0.2mm lift) so the nozzle clears the surface.
- Enable combing to keep travel moves within already-printed areas.
- Fine-tune flow rate to avoid slightly raised lines.
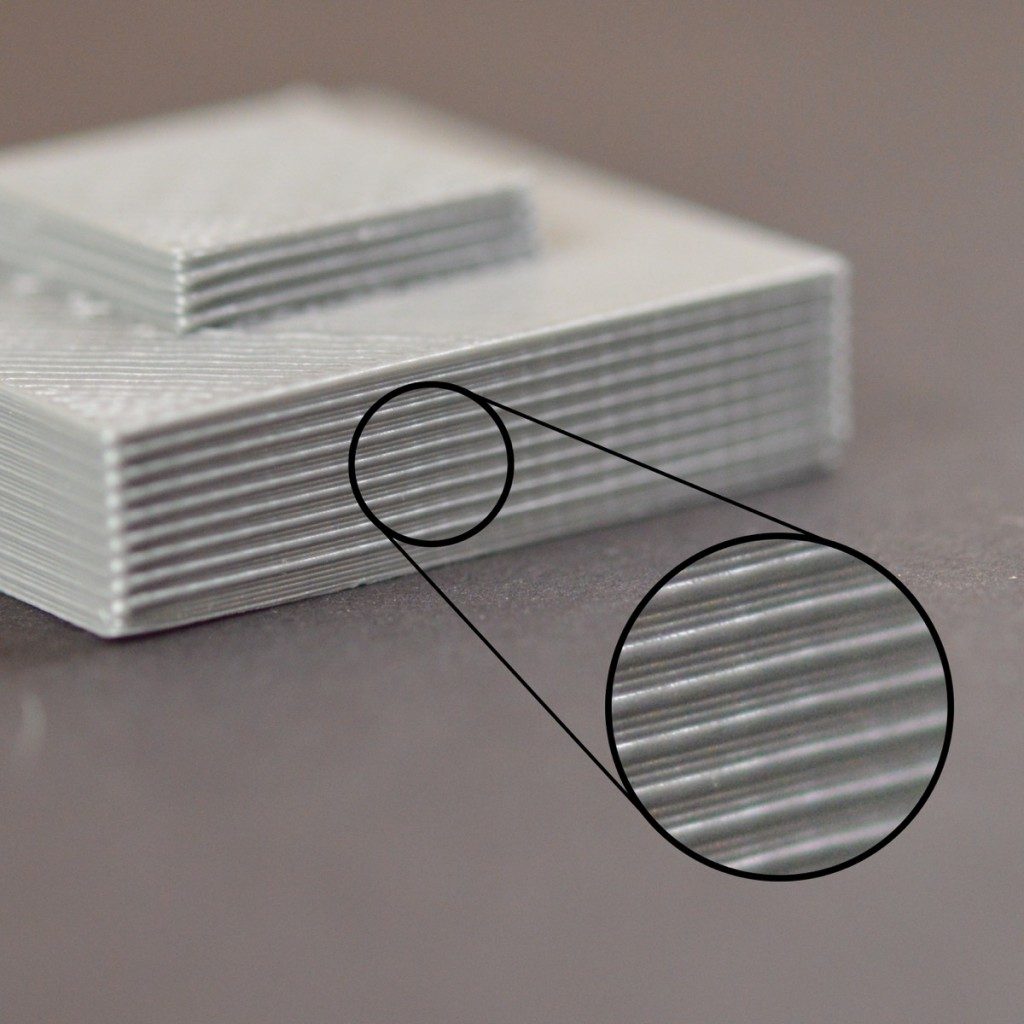
Why it happens:
- Z-axis leadscrew wobble or bent rod causing periodic height variation.
- Inconsistent extrusion — small fluctuations in filament diameter or extruder grip.
- Temperature fluctuations changing viscosity layer by layer.
How to fix it:
- Check the Z leadscrew for wobble or debris — clean and lubricate it.
- Use a flexible coupler between the Z motor and leadscrew to absorb wobble.
- Dry your filament — moisture causes inconsistent flow.
- Ensure your printer is on a stable, vibration-free surface.
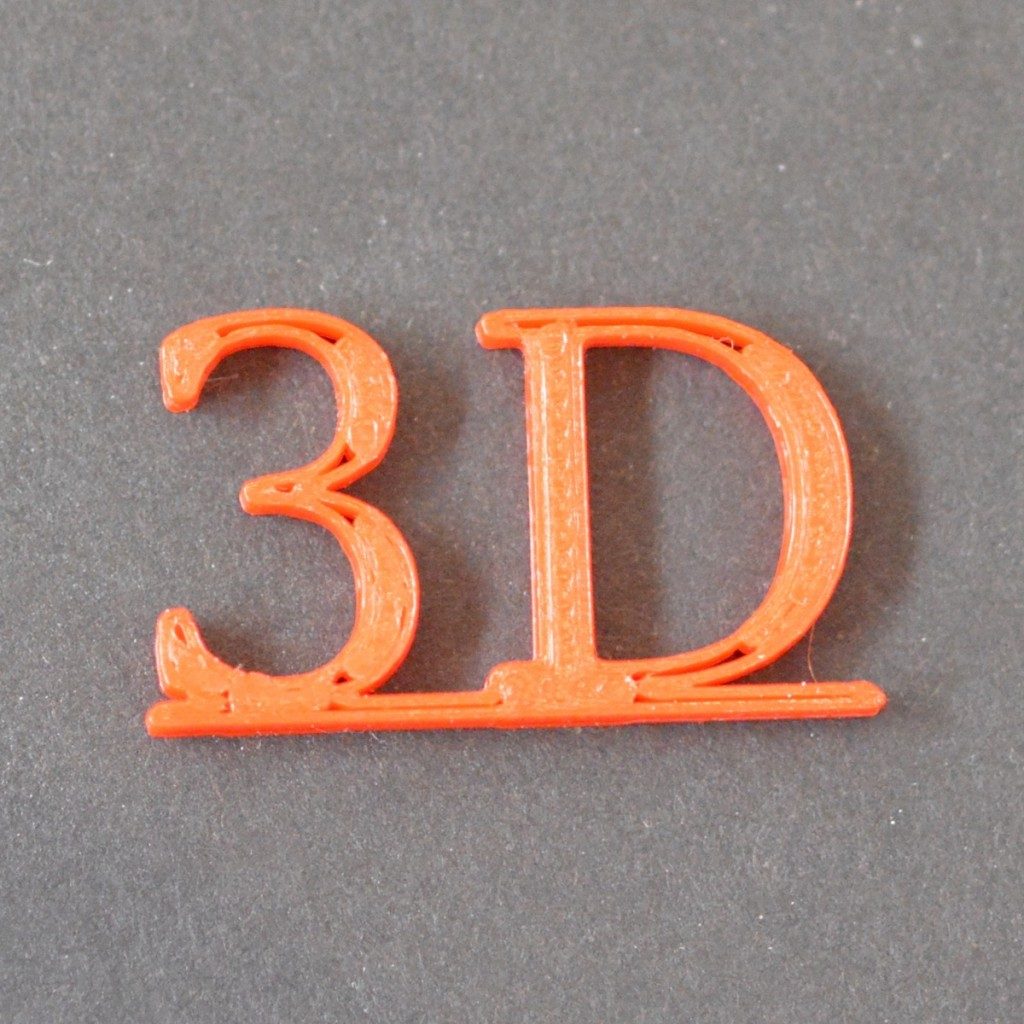
Why it happens:
- Wall thickness isn't a clean multiple of the nozzle diameter — the slicer can't fit a full extrusion line.
- "Fill thin gaps" / "thin wall" settings are disabled in the slicer.
How to fix it:
- Enable "Fill Thin Gaps" or "Thin Wall Detection" in your slicer.
- Design walls as multiples of your nozzle diameter (e.g. 0.4, 0.8, 1.2mm for a 0.4mm nozzle).
- Slightly increase extrusion width to bridge narrow gaps.
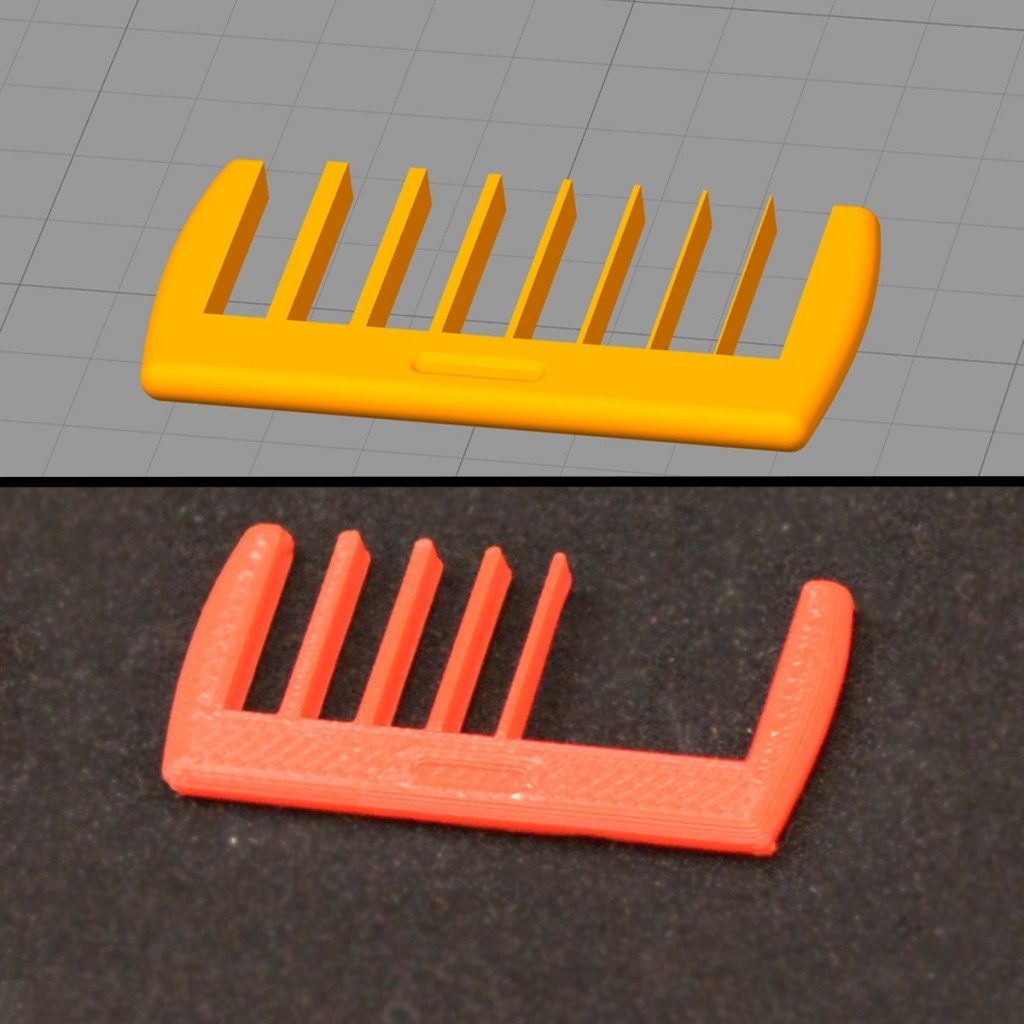
Why it happens:
- Features smaller than the nozzle diameter are silently skipped by the slicer.
- Resolution threshold in slicer set too high, merging small details.
How to fix it:
- Switch to a smaller nozzle (0.25mm) for high-detail models.
- Lower the "Minimum Feature Size" or "Resolution" threshold in your slicer.
- Redesign very fine features to be at least 1–2× your nozzle diameter.
- Check your sliced preview before printing — if it's missing there, it won't print.
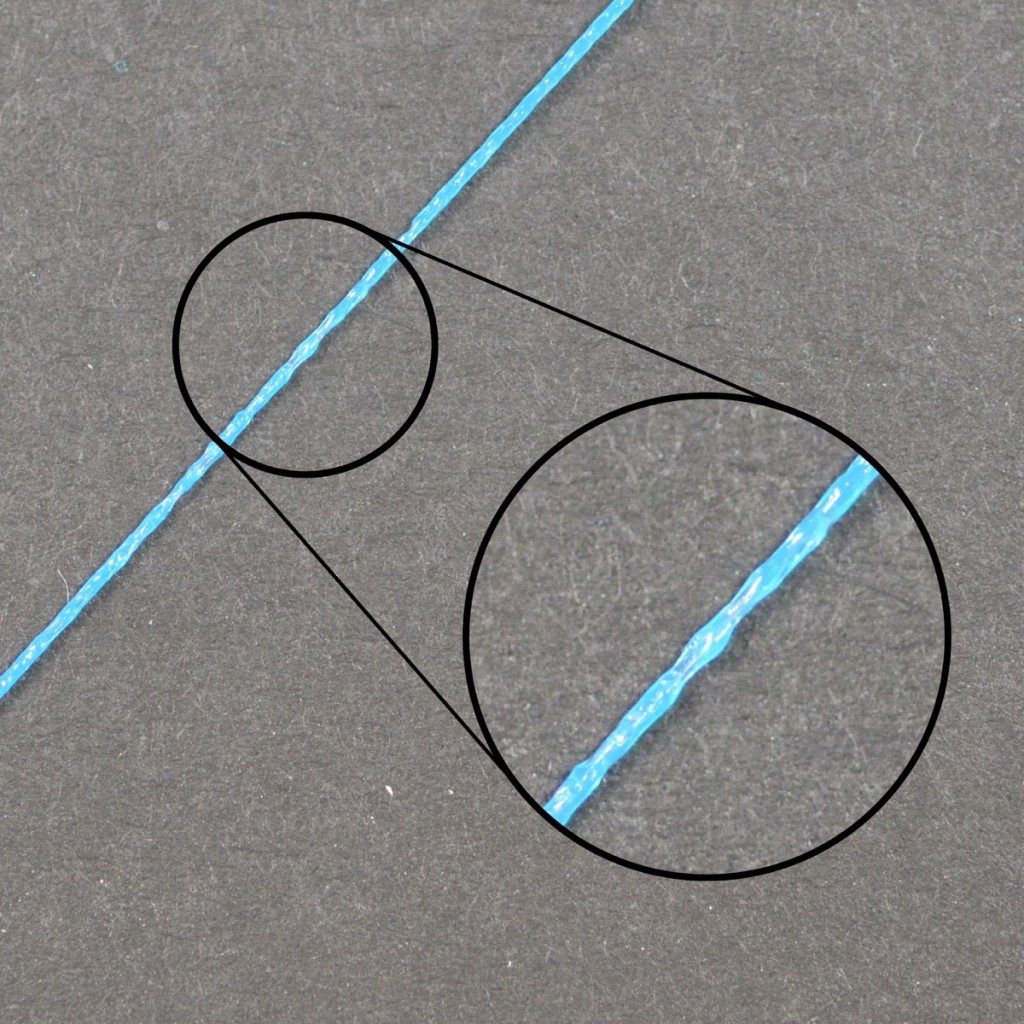
Why it happens:
- Filament diameter varies along its length — cheap or poorly stored filament.
- Partial clog causing intermittent flow restriction.
- Wet filament — absorbed moisture turns to steam and causes random bursts.
- Loose or inconsistent extruder grip.
How to fix it:
- Dry your filament at 45–65°C for 4–8 hours before printing.
- Switch to a higher-quality filament with tighter diameter tolerances.
- Perform a cold pull to clear any partial nozzle obstruction.
- Check and tighten the extruder idler arm and spring tension.
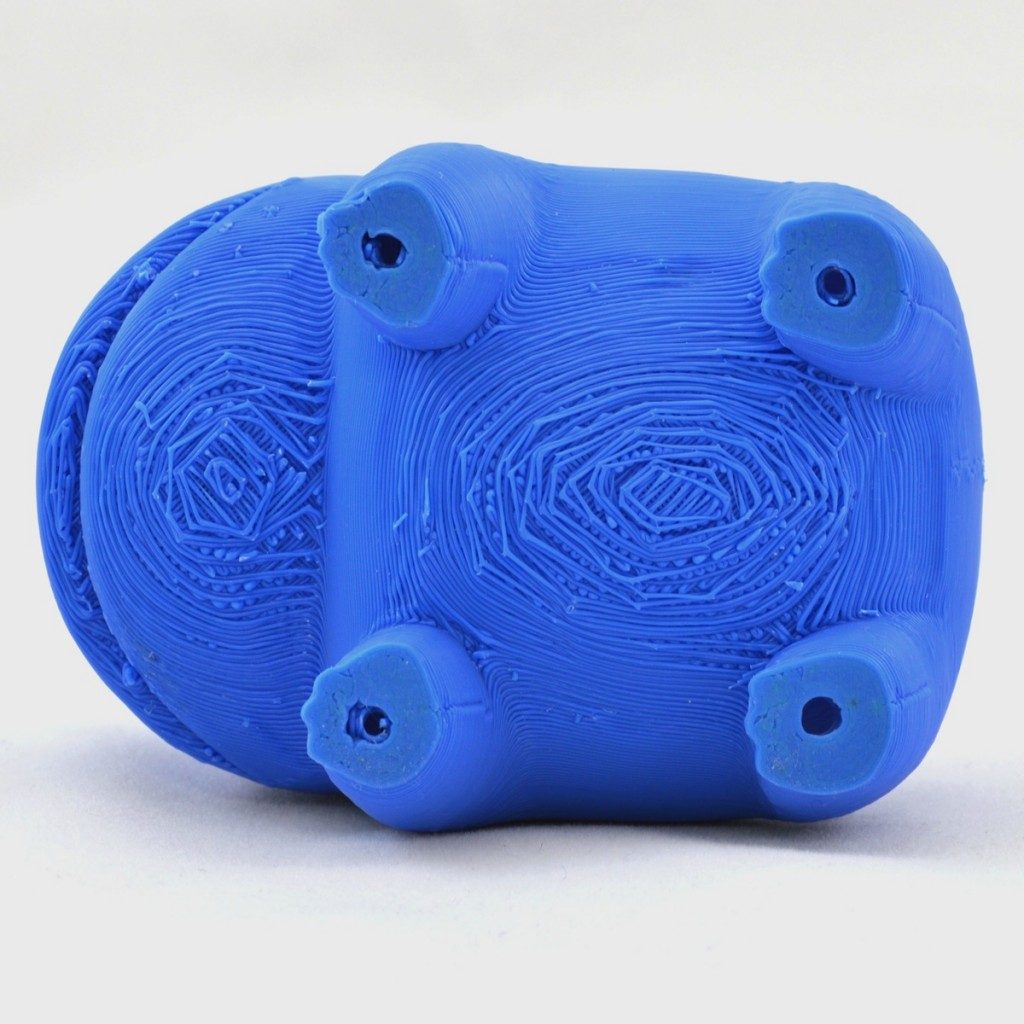
Why it happens:
- Support interface layers are too far from the part — the first bridging layer sags.
- Support density too low, leaving large unsupported spans between support lines.
- Support material fused to the part — too close or wrong interface settings.
How to fix it:
- Enable support interface layers (top/bottom) at 100% density for a smoother contact surface.
- Adjust Z gap between support and part: 0.1–0.2mm is a good balance between surface quality and removability.
- Use a different material for supports (e.g. PVA or HIPS) if your printer supports dual extrusion.
- Increase support density to 20–30%.
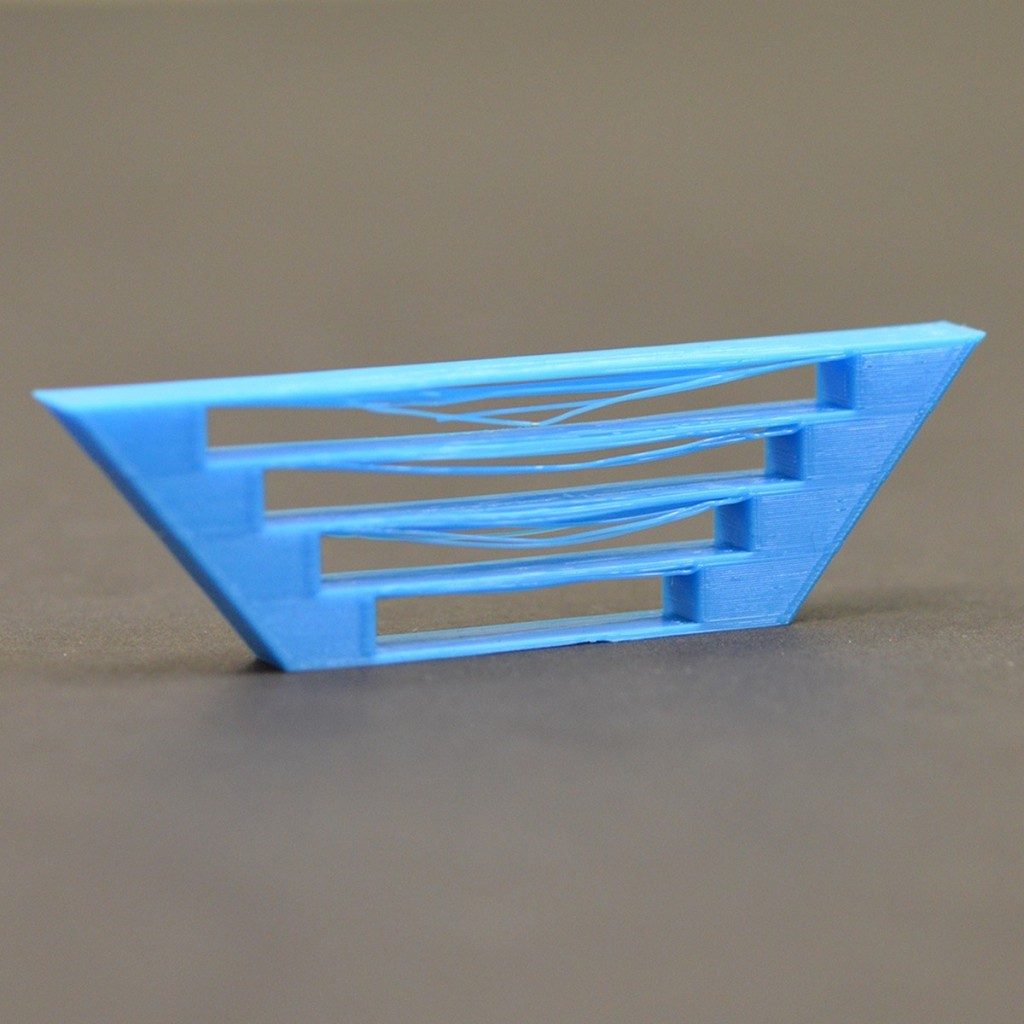
Why it happens:
- Insufficient cooling — filament doesn't solidify fast enough mid-air.
- Print speed too fast for bridging — filament droops before it can tension itself.
- Print temperature too high, keeping filament molten for too long.
How to fix it:
- Maximize fan speed for bridging — 100% cooling is key.
- Reduce bridging speed to 20–40mm/s so filament stays taut.
- Lower print temperature by 5–10°C specifically for bridges (most slicers allow per-feature settings).
- For spans over 50mm, consider adding supports or redesigning the model.
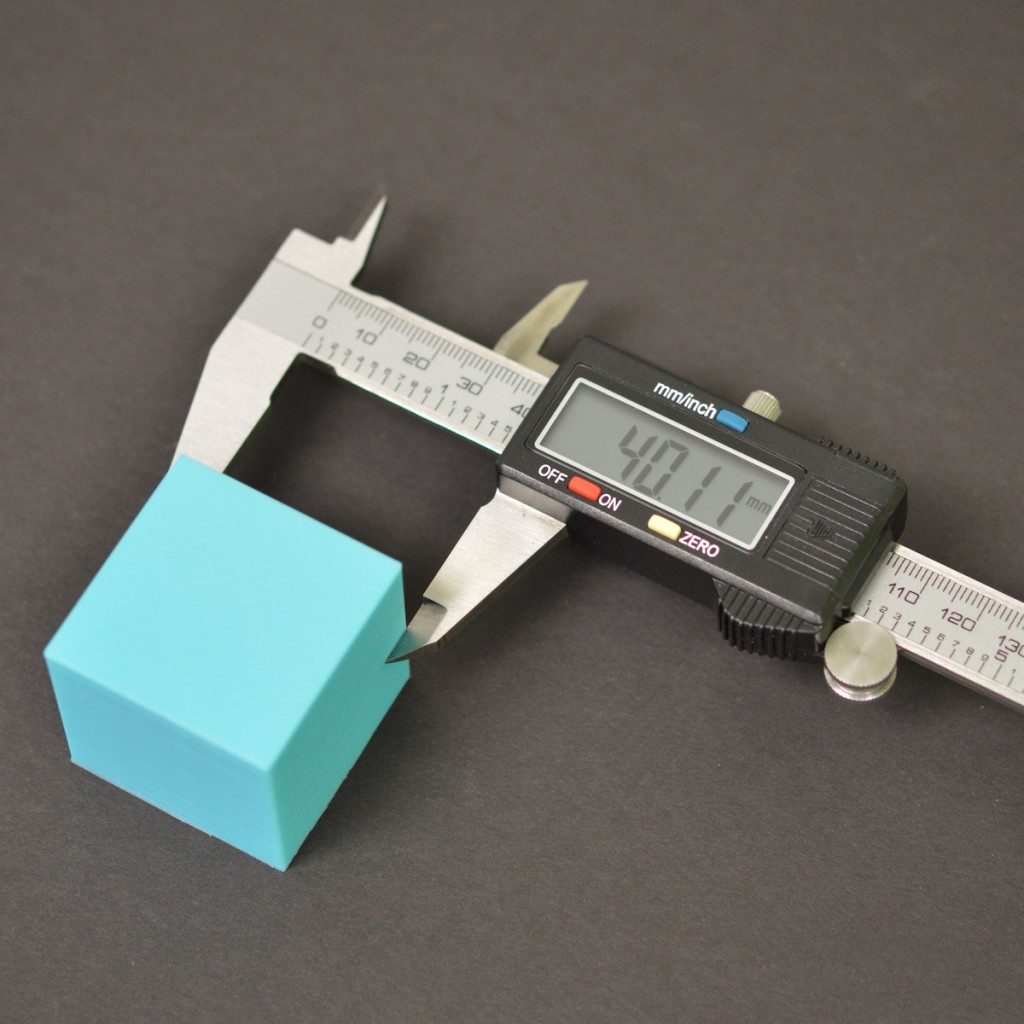
Why it happens:
- Over or under extrusion adds or removes material from the outer walls.
- Steps-per-mm not calibrated correctly for X/Y/Z axes.
- Thermal expansion of the part during cooling causes slight shrinkage.
- Elephant's foot at the base throws off bottom dimensions.
How to fix it:
- Print a calibration cube (20×20×20mm) and measure with calipers — adjust steps/mm if off.
- Calibrate flow rate / extrusion multiplier accurately.
- For tight-tolerance parts, account for filament shrinkage by scaling the model slightly (e.g. +0.5% for PLA).
- Use the "Horizontal Expansion" setting in your slicer to fine-tune XY accuracy.
Why it happens:
- The print loses bed adhesion partway through and the nozzle drags it loose.
- A layer shift causes the nozzle to collide with the print and knock it over.
- Warping lifts a corner high enough for the nozzle to catch on it.
- Vibration or an accidental bump dislodges the part.
How to fix it:
- Improve bed adhesion first — clean the surface, re-level, and use a brim for tall or small-footprint parts.
- Resolve any layer shifting issues (belts, eccentric nuts, motor current).
- Enable collision detection / filament runout sensors if your printer supports them — some firmware can pause or stop on failure.
- Reduce print speed and cooling fan for better first-layer grip on the bed.
- Use an enclosure for materials prone to warping (ABS, ASA, Nylon).
Why it happens:
- Every layer must start and stop somewhere — the transition point leaves a small mark.
- Too much retraction at the seam causes a gap; too little causes a blob.
- Starting each layer in the same XY position stacks the marks into a visible line.
How to fix it:
- Set seam position to "Random" in your slicer to scatter the marks around the surface.
- Use "Sharpest Corner" / "Rear" alignment to hide the seam in a less visible spot.
- Fine-tune retraction distance and speed to minimise the blob or gap at the seam.
- Enable "Wipe before retract" or "Coasting" to reduce ooze at the endpoint.
- Slightly increase overlap between the seam and adjacent perimeters.

Why it happens:
- Most filaments (especially Nylon, TPU, PETG, PVA) absorb moisture from the air in hours.
- Water trapped in the filament turns to steam in the nozzle, causing popping, bubbles, and stringing.
- Moisture weakens layer adhesion, resulting in brittle parts that snap easily.
How to fix it:
- Dry the filament in a food dehydrator or oven at 45–65°C for 4–8 hours (temperature depends on material).
- Use a dedicated filament dryer / dry box with desiccant while printing.
- Store filament in sealed bags or airtight containers with silica gel packets.
- If crackling persists after drying, raise print temperature by 5–10°C to help moisture escape more cleanly.
Why it happens:
- Z-offset (nozzle home position) is set too high or too low.
- Bed is not levelled evenly — one corner higher than another.
- First layer height or first layer extrusion multiplier misconfigured in slicer.
- Bed surface has warped or changed temperature since last calibration.
How to fix it:
- Re-run bed levelling — manual or automatic (ABL/mesh levelling).
- Adjust Z-offset: lower the nozzle if lines don't stick together; raise it if the layer looks crushed.
- Use the "paper test" — you should feel slight resistance dragging a sheet of paper under the nozzle.
- Set first layer height to 0.2–0.3mm and first layer speed to 20–30mm/s for better adhesion.
- If the bed warps with heat, use a mesh bed compensation (BLTouch, CR Touch, Beacon, etc.).

Why it happens:
- Support Z-distance (air gap) is too small — support welds to the model.
- Interface layer pattern is too dense, creating too much contact area.
- High printing temperature increases bonding between support and part.
- Overhang angle threshold too low — supports appear where the model doesn't need them.
How to fix it:
- Increase support Z-distance to 0.2–0.3mm (one layer height) to create a clean break.
- Use a low-density support interface layer (20–40%) to reduce adhesion.
- Try "Tree supports" or "Organic supports" — they touch the model in fewer places.
- Consider dissolvable support filament (PVA for PLA, HIPS for ABS) if you have a dual-extrusion printer.
- Score along the support edge with flush cutters before pulling — reduces tearing.
Why it happens:
- Over-extrusion causes layers to be taller than expected, so the nozzle collides with them.
- Z-offset is too low — nozzle is physically too close to the bed.
- Warping lifts part of the print into the nozzle's path.
- Layer height set too close to nozzle diameter (e.g. 0.4mm layer on a 0.4mm nozzle).
How to fix it:
- Calibrate flow rate / extrusion multiplier to eliminate over-extrusion.
- Raise Z-offset slightly so there's a proper gap between nozzle and print surface.
- Enable "Z-hop on retract" — nozzle lifts before travelling, clearing printed areas.
- Max layer height should be no more than 75–80% of nozzle diameter.
- Fix warping at the root cause (bed temperature, enclosure, brim) so no area lifts up.
Why it happens:
- Brim gap set to 0 — the brim is printed touching the model with no separation.
- First layer squished too much, increasing bonding area.
- Raft air gap too small for the material being used.
- High print temperature creates stronger inter-layer bonding between brim and part.
How to fix it:
- Set "Brim Gap" to 0.1–0.2mm in your slicer so there's a tiny separation line.
- For rafts, increase the "Raft Air Gap" to 0.2–0.3mm.
- Use a build plate adhesive (glue stick, hairspray) rather than a brim if adhesion is the only goal.
- Score the brim/raft boundary with a craft knife before peeling to get a clean separation.
- Try a brim made from a different material (soluble or lower-temp) on a dual-extrusion setup.
Why it happens:
- Hotend temperature fluctuating — PID not tuned, heater cartridge failing, or thermistor loose.
- Inconsistent extrusion due to a partially clogged or worn nozzle.
- Lead-screw Z-axis with a slightly bent screw creates periodic ripples (known as "Z-wobble").
- Filament diameter inconsistencies in a low-quality spool cause periodic under/over-extrusion.
How to fix it:
- Run PID auto-tune on the hotend and save the new values to EEPROM.
- Check heater cartridge and thermistor wiring — replace if there's any looseness or corrosion.
- For Z-wobble, check that the lead screw is straight and couplers are not over-tightened.
- Measure filament diameter at several points — if it varies more than ±0.05mm, switch to a higher-quality spool.
- Try a different nozzle to rule out partial clog causing periodic flow variation.