3D Printed Lamp Bookmark by Arjen
Printed On Creality K2 Plus Using Filament eSun PLA+
Printed without Supports, Printed without Rafts, Infill 10 %
Materials Needed:
3D-printed lamp parts (2 parts per lamp)
Strong adhesive (preferably suitable for plastic)
Small brush or glue applicator (optional)
sandpaper (optional)
Assembly Steps:
Preparation:
Ensure all 3D-printed parts are clean and dry.
optional use fine sandpaper to smooth the surfaces where the parts will be glued for better adhesion.
Apply Glue:
Apply a thin layer of glue to the surfaces where the lamp parts will connect. These are likely the areas where the lamp head attaches to the arm.
Join the Parts:
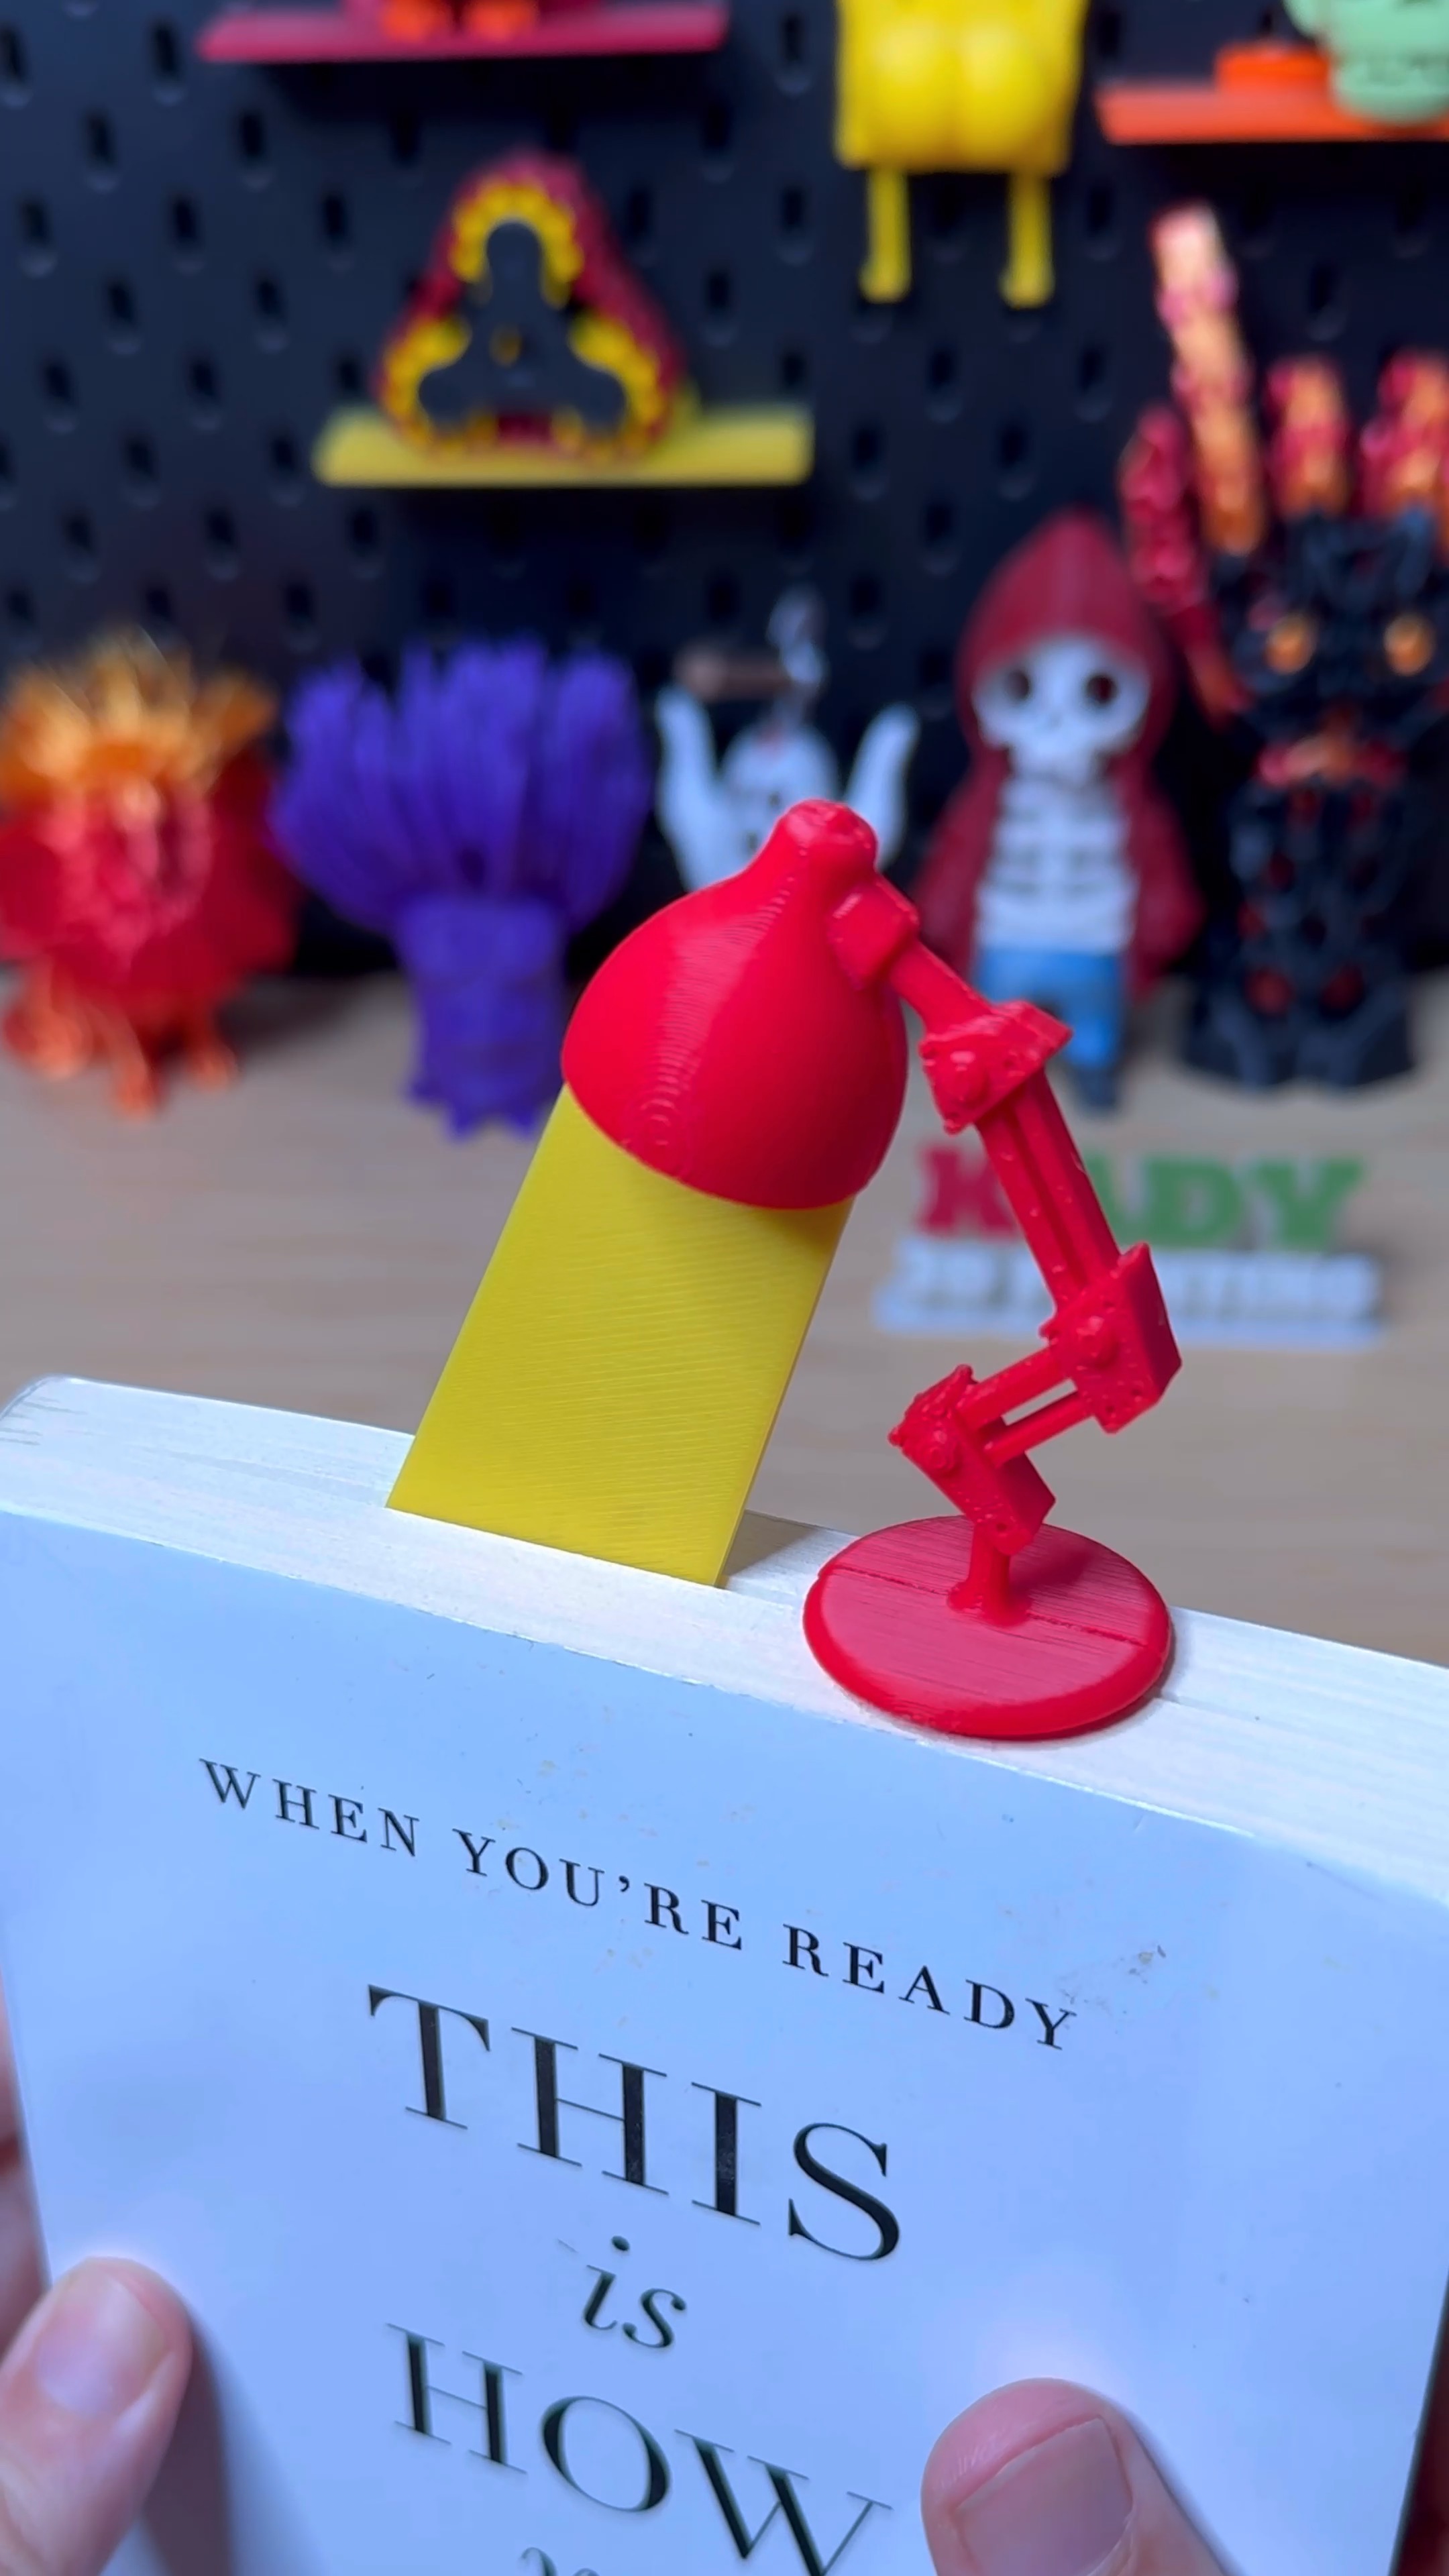
Carefully align the lamp head with the arm as shown in the image.
Press the parts together firmly, ensuring they are properly aligned.
Drying Time:
Allow the glued parts to dry according to the adhesive manufacturer’s instructions, ensuring they are held in place if needed.
Once dry, your 3D-printed lamp should be securely assembled! This one is now ready for use :)
Link not working? Let us know →